Have you ever experienced exerting so much effort on a certain project or goal only to watch it fail in the end? Well, I have. For those of you who know me, you understand that gardening is very close to my heart. One of the most disheartening experiences I’ve had was when I saw my watermelon vine slowly deteriorate during the rainy season. Despite my attempts to keep the beautiful leaves and watermelon flower buds dry and safe from the constant heavy rain, it just didn’t survive.
Slowly, I saw the flowers turn from green to light green to yellow to brown. I took a deep sigh after I realized that it could no longer be revived. The dream of growing a watermelon at home was washed away by the rain as well. What a bummer. I think it took a couple of days for me to finally let go of what happened.
Even before I planted the seed, I knew that we were approaching the rainy season already and it wasn’t advisable for fruiting vines. If I only waited for a few more months, it would have been possible to grow the fruit in a container. But, I failed. I failed to grow a watermelon at home. Nonetheless, I still thank God that I did because it helped me to be wiser in the way I use the resources that I had. It also encouraged me to still put my confidence in Him and in His perfect timing even in my gardening adventures.
Seven months after that incident, by faith, I decided to plant a melon seed. This time, I planted it at the start of the year, so I was sure that it wouldn’t encounter daily heavy rains anymore. After taking care of the vine for two and a half months, by God’s grace, I was able to harvest my first homegrown melon at home. While I was eating a slice of the sweet melon, I couldn’t help but feel overjoyed because it finally happened! I also remember telling my siblings how mind-blowing and heartwarming it was to eat fresh fruits and vegetables grown at home.
Through this experience, I was reminded of my former blog post about growing watermelon at home and how God’s timing is always perfect. Yes, it may have been rough for me at first, especially when I saw that my efforts were “put to waste”. However, I’m learning that disappointments, failures, and discouragements will always be around. But, these things shouldn’t give us an excuse to stop trying and doing our best again. What I appreciate about disappointments and failures too is that we get to have opportunities that help us grow more in wisdom, knowledge, and character.
Mary Pickford once said “If you have made mistakes, even serious ones, there is always another chance for you. What we call failure is not the falling down but the staying down.”
Maybe some of you are also going through a rough situation. Maybe some of you have experienced failure recently. I want to encourage you today to get back up again and keep on doing your best. By God’s grace, you can! I pray that in spite of the pain or struggle you may be feeling, you will still find hope in the goodness of the Lord.
“Trust in the Lord with all your heart
and lean not on your own understanding; in all your ways submit to him,
and he will make your paths straight.
-Proverbs 3:5-6
Note: I’ll share more about the process and experience of growing melons at home in another blog post. :)
“Don’t give up in doubt what you planted in faith.”- Elisabeth Elliot
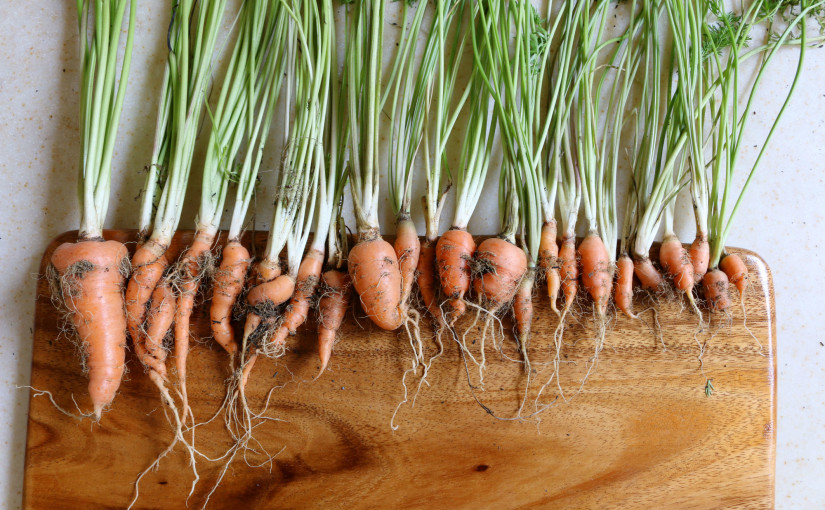
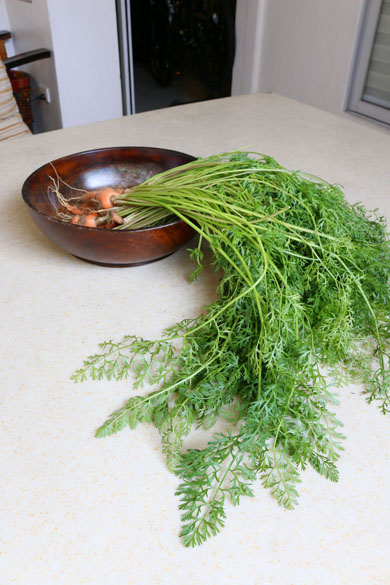
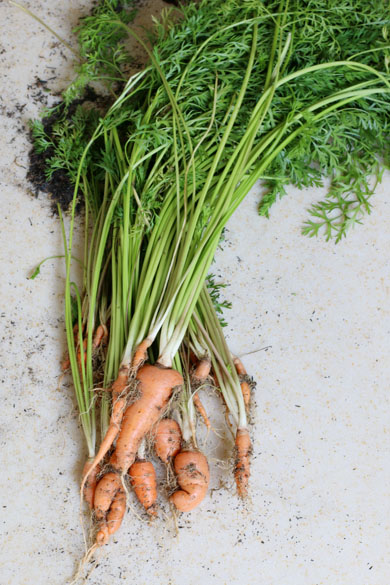
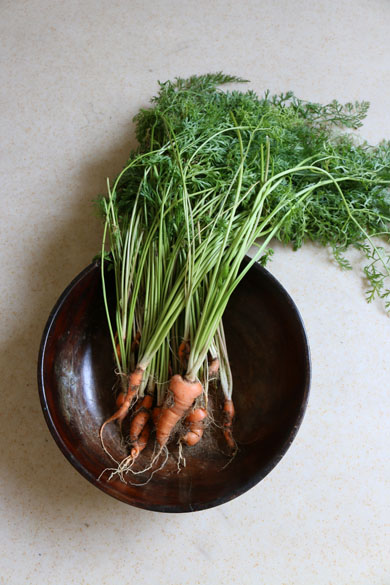
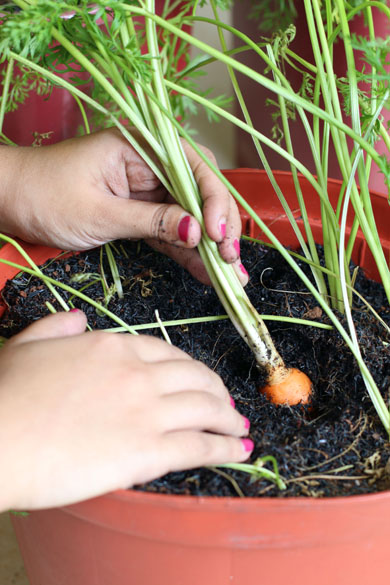
I read this statement while I was browsing through some photos online. It reminded me so much of my experience with planting and harvesting carrots at home. It was my first time to plant a type of vegetable that grows underneath the soil, which made harvesting more faith-stretching for me. As usual, I bought the carrot seeds from “Seeds of Hope” which can be found at any SM Supermarket. They also sell the seeds at Ace hardware or at the gardening stores at the entrance of SM Megamall (building A).
carrots
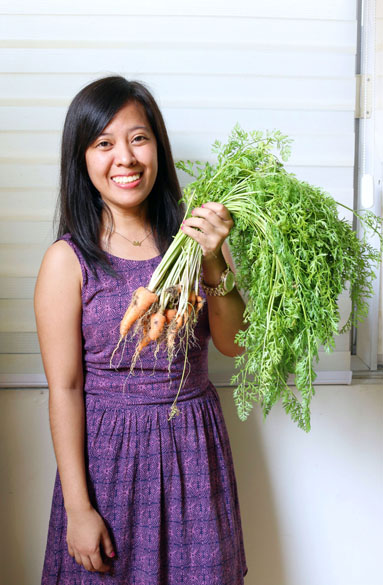
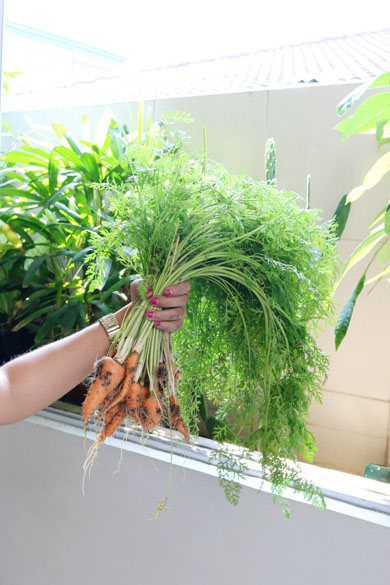
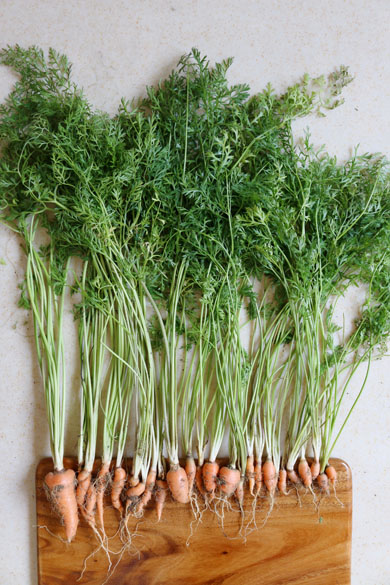
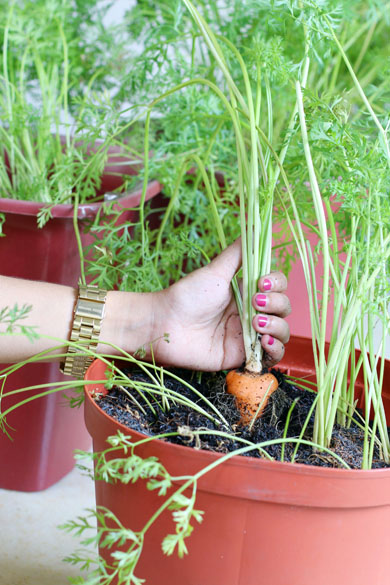
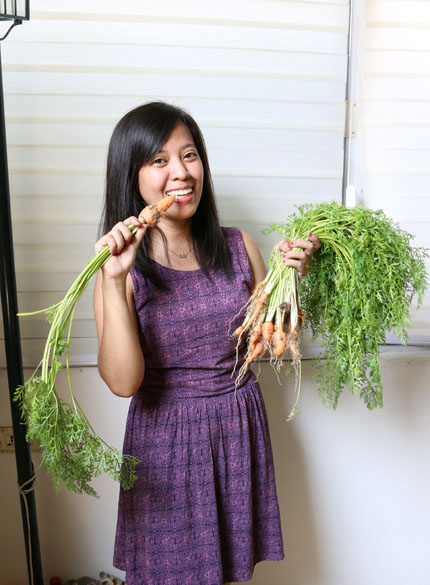
After months of waiting, by God’s grace, I finally had the privilege of harvesting my own carrots at home. Woohoo! Even though they didn’t reach their maximum size, they were still a sweet surprise (literally too). Hopefully, I can grow a second batch early next year. Personally, I think that growing carrots is easier than growing TOMATOES and CORN at home. I can’t wait to grow more soon! As always, gardening at home helps me appreciate the crops and our Creator more. It really is an amazing experience to see fruits and vegetables grow from tiny seeds. Tasting our homegrown crops still is quite mind-blowing. I really am grateful for the experience, which is why I want to encourage you to try it too! If you’re already growing carrots or other fruits/vegetables, let me know! Leave a comment below and share your gardening experience!
carrots
Tips on Growing Carrots at Home:
1.Use loose potting soil. It will help produce straight carrots since they won’t have to struggle growing through thick, hard, and rocky soil.
carrots
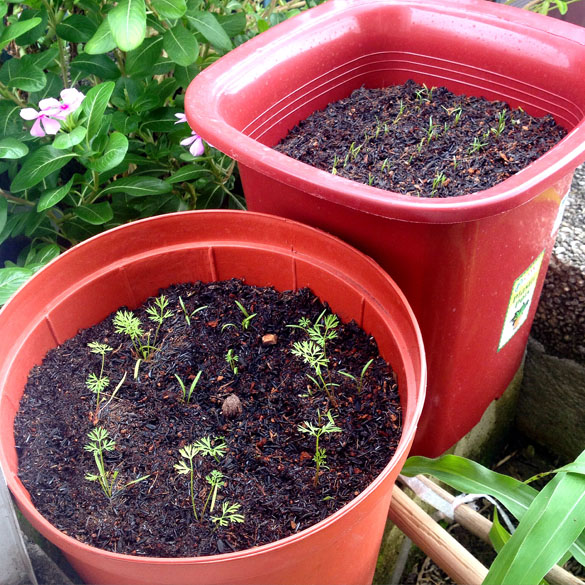
2. Plant the carrot seeds directly on the permanent container pot/bed. They don’t like growing in small plastic cups or nursery beds. They also don’t like being transplanted.
3. Plant them in rows. The stems of the carrot plants are very fragile. So, planting several seeds beside each other will help in giving support to the batch of plants. This will also help you differentiate the carrot plants from weeds growing in the same pot/bed.
4. Spray water lightly on the soil until water comes out of the pot’s holes or until the whole soil area is moist.
carrots
5. Use fertilizer every two to three weeks. I use Jobe’s organic fertilizer spikes for my vegetables.
carrots
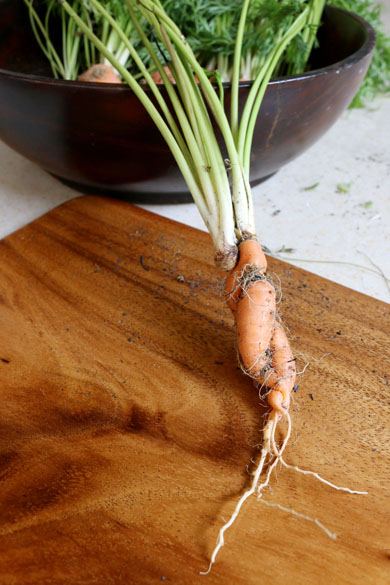
6. When the seedlings grow 2-3 inches tall, start trimming the weaker plants in the rows. Unfortunately, we need to let go of some of the plants because we don’t want to overcrowd the soil with too many roots. Overcrowding will lead to producing smaller and intertwined carrots. (Although having intertwined carrots or carrots with legs can be cool, sometimes.)
carrots
7. You can help the stems and leaves grow upright by carefully and lightly tying them together. You can use plastic straws (strings).
carrots
8. When you see carrot tops peeking out of the soil, cover them with more loose potting soil. When the carrots are exposed to too much sunlight, their tops may turn to green.
9. It usually takes three months before the carrots can be harvested. A good indication is when the stems are already 12 inches high.
carrots
10. Harvest the carrots when you’re ready to eat or cook them. Crops harvested lose their natural sweetness as the days go by.
carrotscarrots
I hope you can join me in growing something green! ‘Til my next carrot experience. :)
For more gardening updates and tips, feel free to visit the ff. pages of ANYONE CAN GARDEN. :)
I have recently embarked on a new gardening adventure at home. By faith, I am growing watermelon vines in a container bed! Yay! It all started when I was eating a slice of sweet watermelon in the cafeteria at work. My colleague and I were talking about some of the vegetables I’ve planted and I made a joke about planting the watermelon seeds from the slice of fruit that I was eating. Nonetheless, I went home that day with a small container filled with seeds and I planted them in a cup of soil. I really enjoy planting and growing seeds because I get to experience the privilege of knowing God more and I get to witness the seeds grow and bear fruit. I still have a couple of months to go before I harvest (by faith!) sweet watermelons. But, for now, I would like to share more about what I am learning from the vines I’m currently growing and how I am encouraged by God — who is always on time.
Watermelon vine
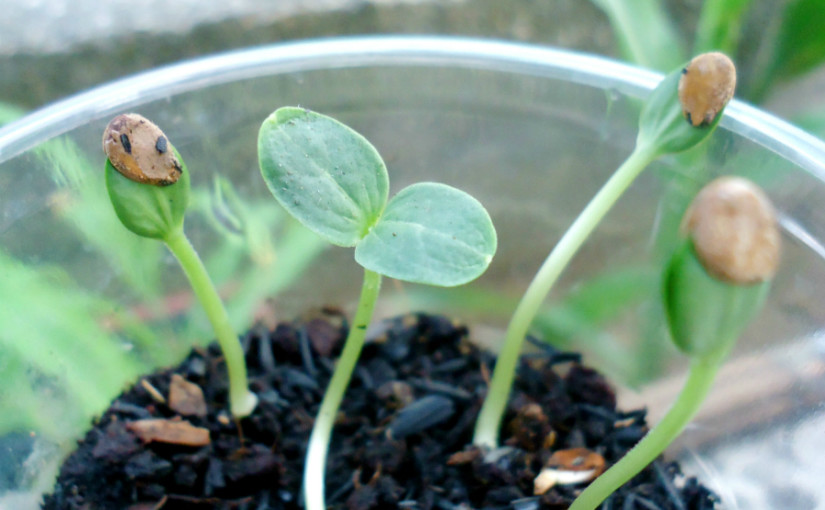
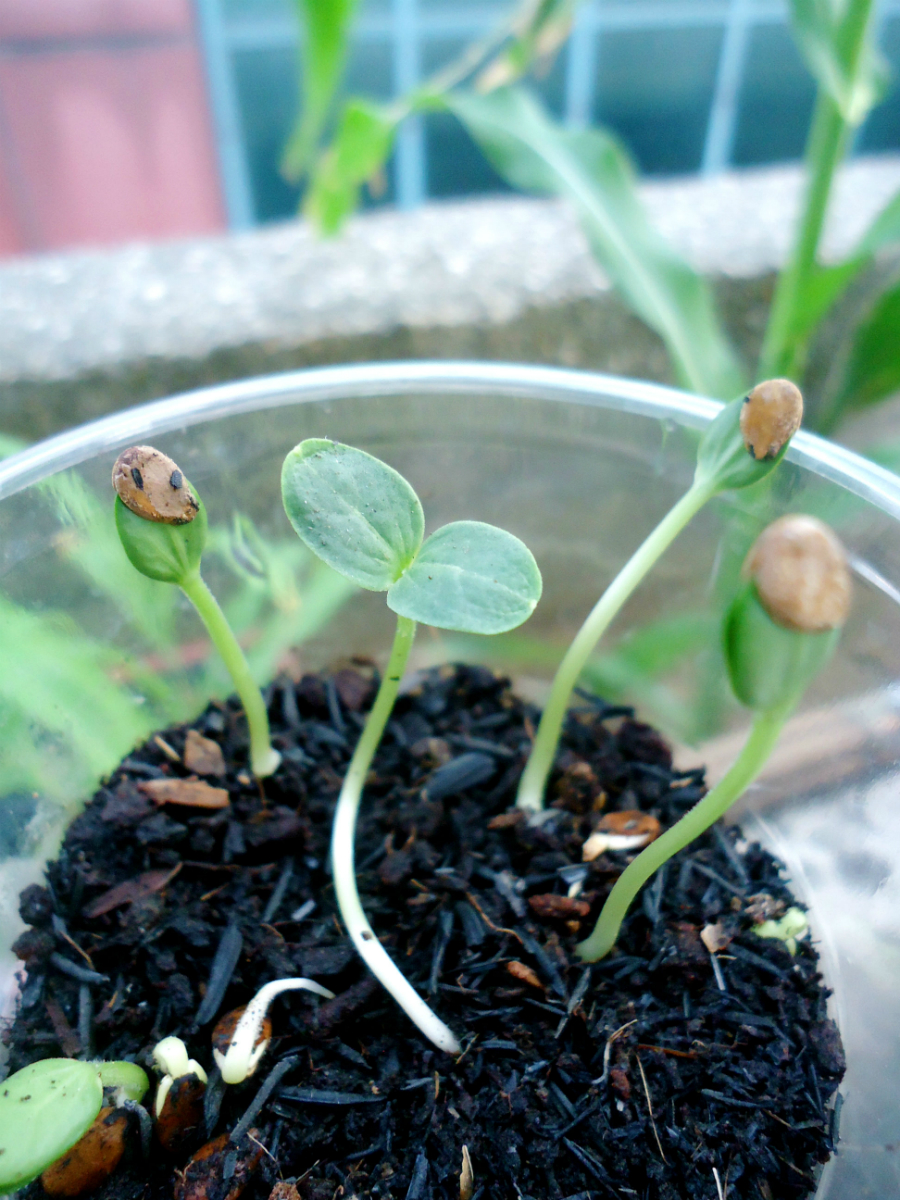
About a week after I planted the seeds, I came home from an out-of-town trip with friends and I remember checking my plants first before I slept that afternoon. To my surprise, I saw several sprouts growing in the cup where I planted the watermelon seeds! The sprouts looked so sturdy compared to the other fruit/vegetable sprouts I’ve grown. Also, they were beautifully long and happy. They even had the brown watermelon seeds attached to the leaves which gave me the assurance that they weren’t just weeds.
watermelon seedlings
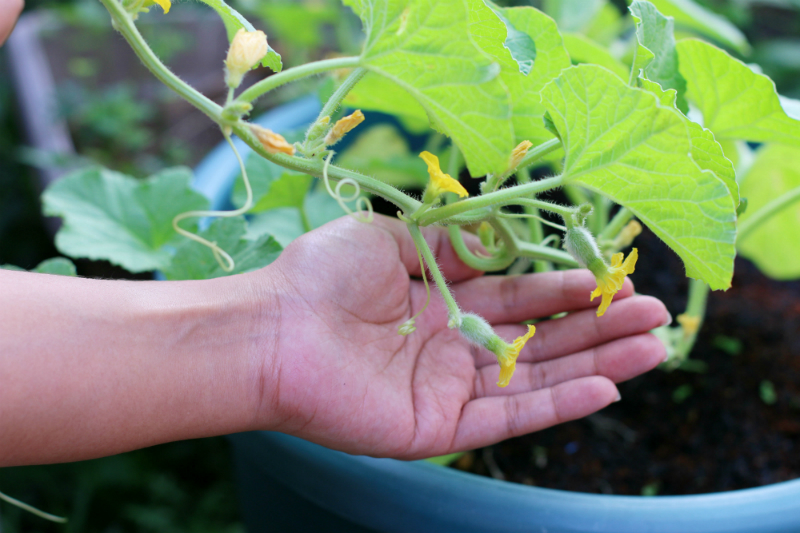
When the sprouts grew bigger, I transferred them to a larger bed. Every day for five weeks, I watered the plants and provided fertilizer and mulch to help them grow. Taking care of vines at home is pretty exciting especially since it’s my first time to grow them. As I studied the different stages that the vine goes through, I learned that watermelon plants have male and female flowers too. When I found out about it, I remembered how my corn plants also had male and female flowers and how they also needed to be pollinated by hand in order for them to produce kernels of corn.
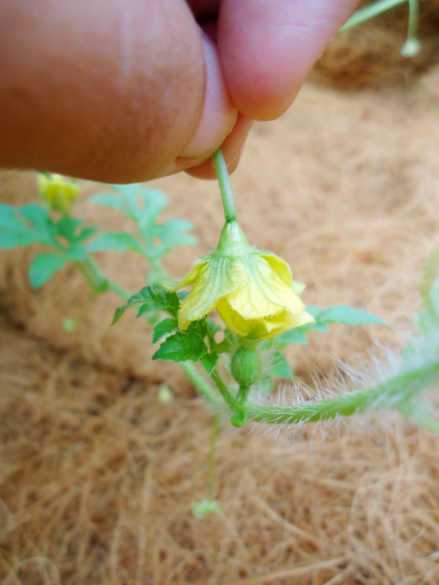
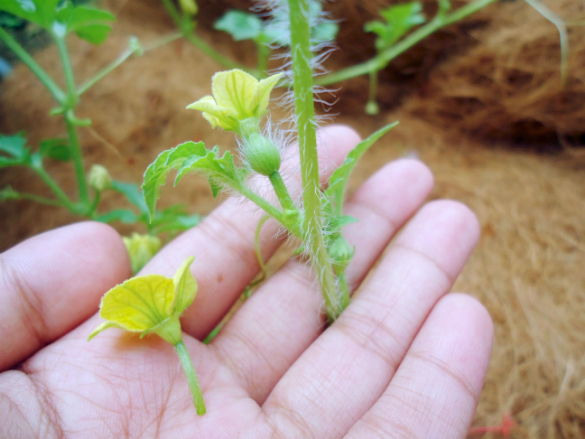
Pollinating the male and female watermelon flowers by hand.
However, the main difference between pollinating corn plants and watermelon flowers is the TIMING. Yes, for both plants, it is advisable to pollinate in the morning so that the sun’s heat can help activate the pollens once they touch the female flowers. BUT, corn plants can be pollinated everyday for a week since the tassels can produce pollens for days. If you missed a day, you can still pollinate the corn plant the next day. On the other hand, for the watermelon vines, the female flower opens its petals for only ONE DAY. If we don’t get to brush the pollens from the male flower to the female flower in the morning on the only day it opens up, the watermelon fruit from that female flower won’t grow. It will only dry up and die.
Talk about PRESSURE. Haha.
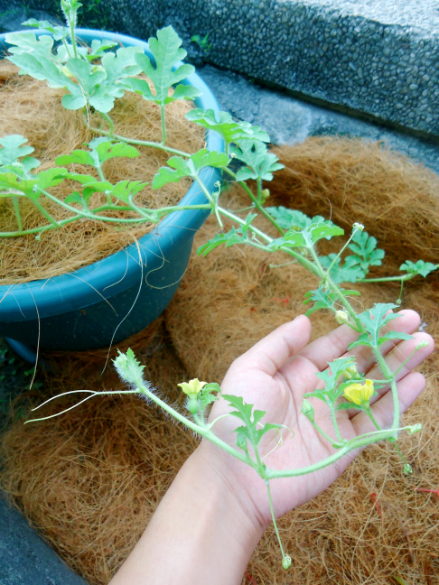
watermelon vine
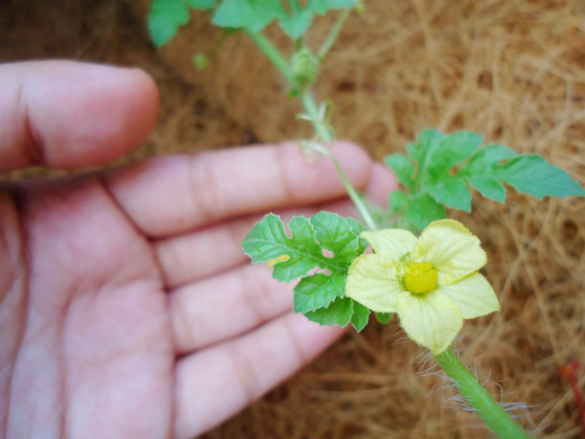
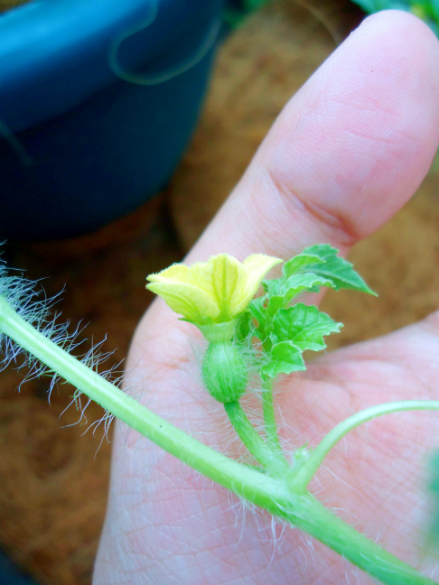
Last June 28, I saw the first few male flowers growing on the vines. Every day after that, 1-2 male flowers would grow and then, dry up. I was already starting to panic because more and more male flowers were growing and I knew that in a few days, the female flowers would then start to appear and open its petals for only a day. Finally, two days later, the first female flower appeared. You could tell that it was a female one since it had a small watermelon-like body below its petals. The male flowers only had a thin stem. But since the petals of the female flower weren’t open yet, I had to wait until the morning to pollinate them.
Male and female flowers of the watermelon vine.
Before I slept that night, I remember thinking about it and telling God “What if it doesn’t open tomorrow morning before I leave for work? What if it opens when I’m already out of the house? If that happens, I’ll miss out on pollinating the flowers and the fruit won’t grow!” I guess it was nerve-racking for me because after weeks of taking care of the vines, as much as possible, I really would want them to bear fruit. So, I prayed about it that night and surrendered the concern to God. If He wanted it to happen, I knew that He would allow me to pollinate in the morning.
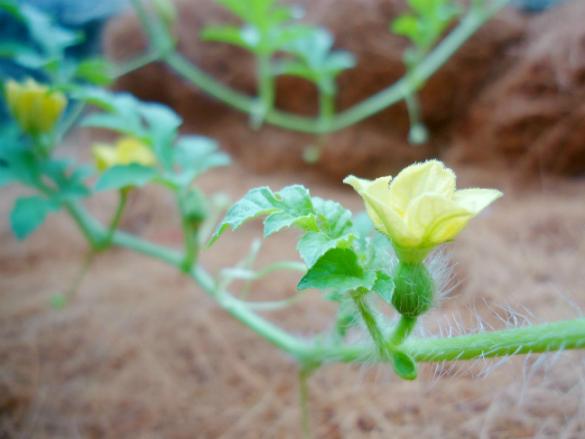
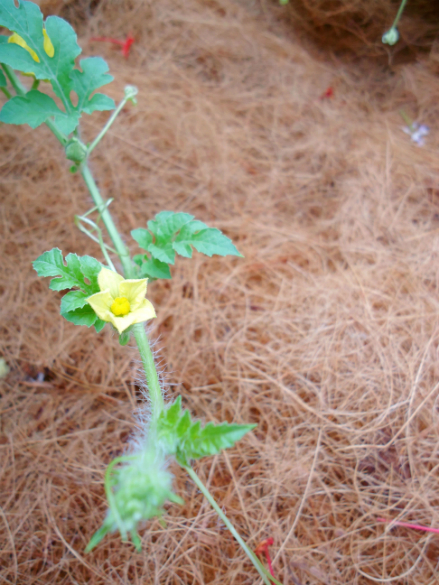
Watermelon vine’s female flower
When I woke up the next day, I rushed to our veranda (where the vines were) and I saw that the female flower had already bloomed. Oh my goodness. It was time! By God’s grace, the flower opened its petals early and I had the opportunity and time to pollinate it! It only took a few seconds, but the future of the watermelon fruit greatly depended on it. Haha.
After pollinating the flower and watering the plants, I was ready to take a shower and go to work. However, while I was preparing my clothes, my mom informed me that there were some concerns with our transportation. To make the long story short, my sisters and I needed to help each other and my dad go to our respective destinations that morning using only one car. Because of the slight delay, I knew that I was going to go to work at a later time. So, while waiting, I decided to make good use of the extra time that I had at home. I ended up making a temporary cover/shield to protect the seedlings and plants from heavy rains, which was something that I couldn’t do in the evening.
watermelon vine
After about an hour, my sister graciously drove me to work and I remember thanking God in my heart for His perfect timing that morning. Even though I was worrying about the flowers the night before, He gave me peace to trust in Him and to wait on His best timing the next day. He certainly knows how to grow watermelon vines. He created them! So, I really didn’t have any reason to worry about not being able to pollinate on time or not being able to grow fruits from the vines.
I started the day with a grateful heart because I was encouraged by God to always trust in His perfect timing even when things don’t make sense or when I am faced with the unknown. God can and He will do anything if He thinks it’s for the best.
“Faith in God includes faith in His timing.” –Neal Maxwell
Male and female flowers. Watermelon vine.
When I went home that night, an interesting thing happened. It suddenly rained after a hot day. It didn’t rain in the morning while I was pollinating the flowers. It also didn’t rain while I was preparing the covers and shields for the plants. But, by God’s grace and in His perfect timing, it rained at night when everything was done and alright.
“But blessed is the one who trusts in the Lord,
whose confidence is in him. They will be like a tree planted by the water
that sends out its roots by the stream.
It does not fear when heat comes;
its leaves are always green.
It has no worries in a year of drought
and never fails to bear fruit.”
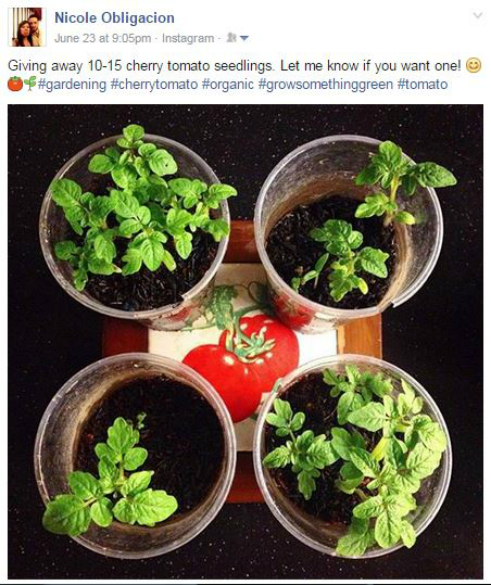
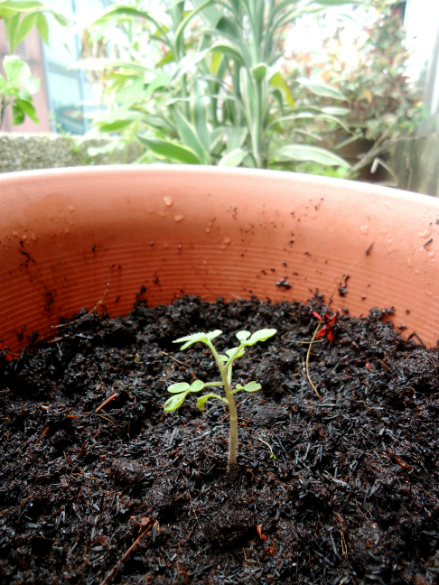
A few weeks ago, I started to grow a new batch of cherry tomato plants and I ended up planting a lot of seeds. I didn’t expect all of them to grow, but by God’s grace, they did! So, for quite some time now, I’ve had more than 15+ seedlings happily growing in their own cups at home. However, because we didn’t have space for these 15 cherry tomato plants anymore, I decided to give the seedlings away. I posted a photo of them on my Facebook page with a caption: “Giving away 10-15 cherry tomato seedlings. Let me know if you want one!” Surprisingly, a lot of friends left comments on the photo and accepted the challenge of growing their own cherry tomatoes at home. YOU ARE AMAZING. Thank you!!!
cherry tomato seedlings
To my new gardener friends, I hope and pray that you will enjoy your gardening adventure with your new seedlings as you see them grow and bear fruit in the coming months. To show my support, I listed down some of the helpful tips I’ve learned over the past years in growing cherry tomatoes at home. Enjoy! :)
HOW TO GROW CHERRY TOMATOES AT HOME
Materials you’ll need:
Tomato seeds
A Hard Plastic Pot with holes at the bottom — at least 12”x12” in height and diameter.
1 bag of loose potting soil — enough to fill the pot.
Fertilizer for tomatoes/vegetables
Long bamboo sticks or similar ones (about at least a meter tall) that can help hold the plant upright.
Plastic straw – for tying/securing the plant on the sticks
Mulch or dried leaves/straw/twigs
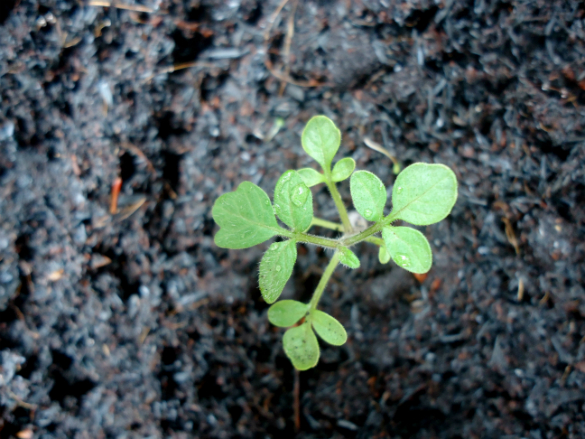
cherry tomatoes
GROWING SEEDLINGS
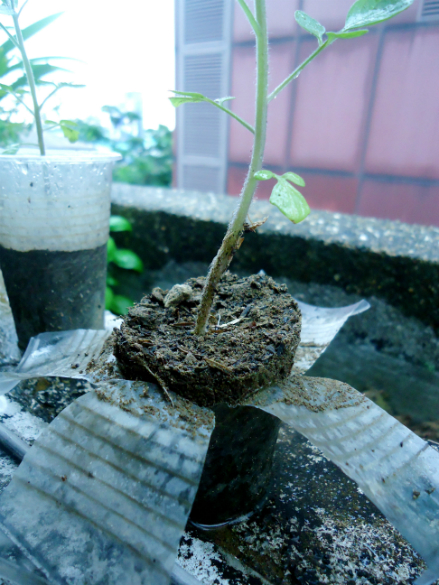
Add loose potting soil to a cup (4/5 full) and lightly bury a seed or two in the soil. You can plant two seeds in one cup just in case one of them doesn’t germinate or grow. However, if both seeds successfully grow in one cup, make sure to carefully separate the two seedlings (without damaging the stem or roots) while they’re still small or about an inch tall. When the seedlings grow a few more inches (2-3”), you may now move them to a bigger container with holes at the bottom and with a good drainage system. By doing so, they will develop more roots and help the plant become more sturdy. I usually fill half of the pot/container with soil and then sprinkle some of the fertilizer before filling it up with potting soil again. Once its ready, I dig a hole in the middle of the container, remove the seedling growing in the cup of soil, and gently place it inside the hole. I also top the soil with mulch or dried twigs and leaves to help retain the moisture in the soil.
As the seedlings grow in their new pot, it’s very important to regularly water them. When I was younger, I thought that watering just the leaves of the plants was the best way to provide for their H2O needs. However, after experimenting with different fruit-bearing plants over the past years, I learned that in order to keep the plant happy and healthy, we must focus on watering the soil — where the roots are. Even if we don’t water the leaves, the plant will still grow as long as we regularly water the soil and roots.
cherry tomato seedling
How often should we water the plants?
Once a day is enough. However, if you live in a tropical country (like me!), the plant will most likely want to be watered twice a day – once in the morning and once in the evening.
How do you know when the water is enough or too much for the plant?
When we water plants in containers, a good way to know if we’ve added enough water is if we start to see the water come out of the drainage holes of the pot. When this happens, you may already stop watering since we know that most, if not all, parts of the soil in the pot already received water.
PROTECTING THE ROOTS
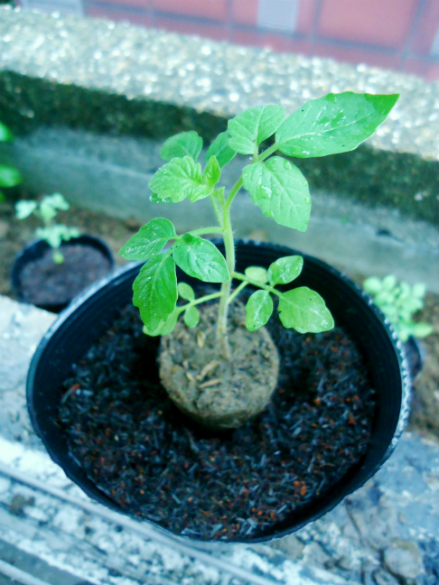
In the first two parts of this post, I’ve mentioned how important it is to take care of the plant’s roots. Even though we don’t usually see the roots, they play a very important part in helping the plant grow and bear fruit. Not only do they serve as a support for the whole plant, but they also absorb all the water and nutrients found in the soil! So, how can we protect the roots? It’s pretty simple. Keep them covered with soil! We don’t want the roots to be exposed under the scorching hot sun or the extremely cold weather at night. We want them to be wrapped with a blanket of soil ALWAYS. If ever you see the plant’s roots peeking or coming out every now and then, you can lightly throw more potting soil on it, until you can’t see the roots anymore.
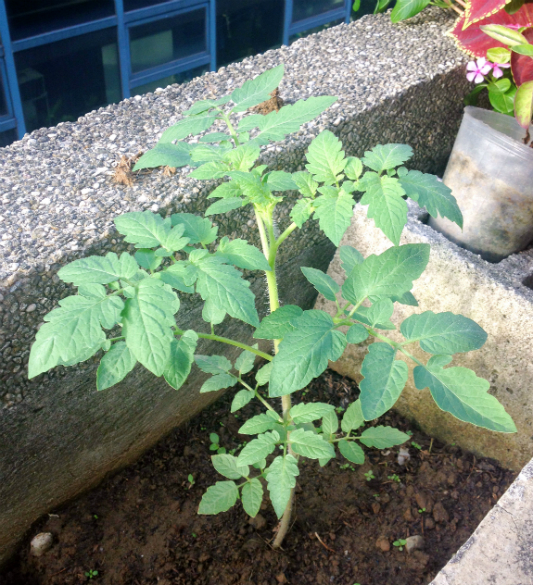
cherry tomato plant
SUPPORTING THE PLANT
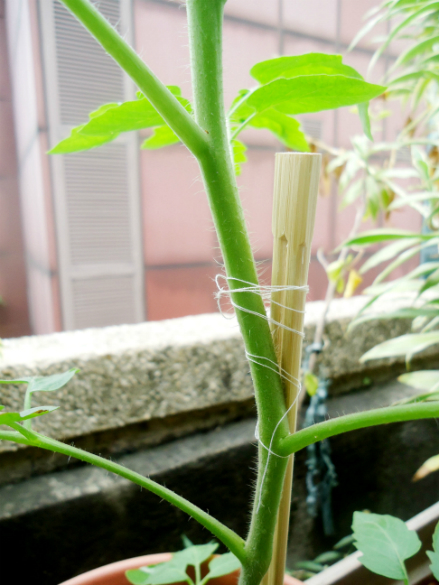
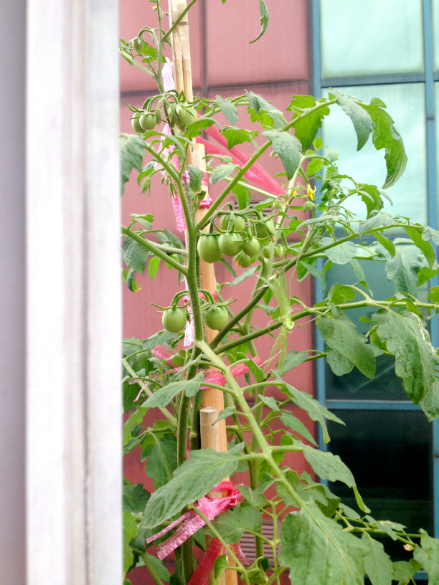
When I first planted tomato seeds at home, I didn’t know anything about growing them. It was only until the plant had reached its “teenage years” that I realized the importance of providing a sturdy support system for it. Supporting the plant may be done by letting it grow inside a store-bought tomato cage or by tying the plant on strong and long sticks secured on the soil.
Since I planted my tomatoes in containers (large pots and beds), I didn’t have enough space to use tomato cages. So, I made use of thick, ordinary sticks and thin bamboo sticks to secure and support the plants. I tied them on the sticks with a plastic straw (the one used in tying huge cardboard boxes). And as the plants grew, I just adjusted and added the plastic straws attached to them. Be extra careful in tying the plants. Make sure not to damage the stems or use straws/strings with sharp edges that may harm and scrape the stems.
cherry tomato plant
Although it might require a bit more effort, staking and supporting the plants early on will be very helpful, especially when the plant develops flowers and fruits. The cherry tomatoes will eventually weigh the plant down, so it’s important to keep the main stem and branches upright and secure. We wouldn’t want them to snap off and break.
cherry tomato plant
FERTILIZING THE PLANTS
Tomato plants love to be fed with nutrients. So, as the plants grow, they need to be surrounded with fertilizer every now and then. I add fertilizer to the potting soil in four different stages:
On the day of planting the tomato seedling
When the plant is about two feet tall
When the plant starts to produce flowers
After it starts growing cherry tomatoes
The best thing about growing your own vegetables and fruits at home is you can control the materials added to the soil. For the past years, I’ve used organic and natural fertilizers in my soil. But, if you prefer to use chemicals, then it can still help the plant grow and bear fruit. For the natural fertilizers, you may use the ff. in your soil: compost, washed and crushed egg shells, banana peels, coffee grounds, washed shrimp shells, raw fish heads, Epsom salt, etc. You may also try organic tomato fertilizer spikes sold in the hardware or gardening stores.
cherry tomato flowers
Note: When fertilizing tomato plants, it’s important to provide a healthy amount of nitrogen to the plant during its early stages. After the plant grows more vines and branches, you may lessen the nitrogen in-take and add more phosphorus and potassium in the fertilizer-soil mixture.
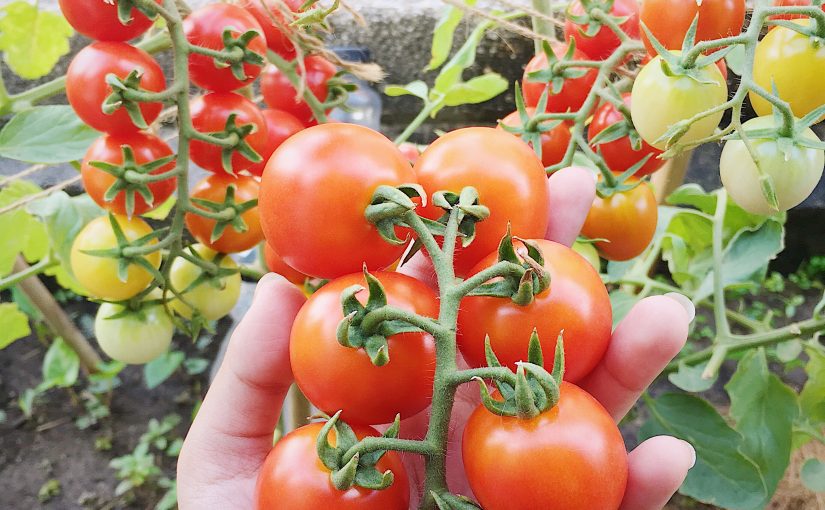
Cherry tomatoesCherry tomatoes
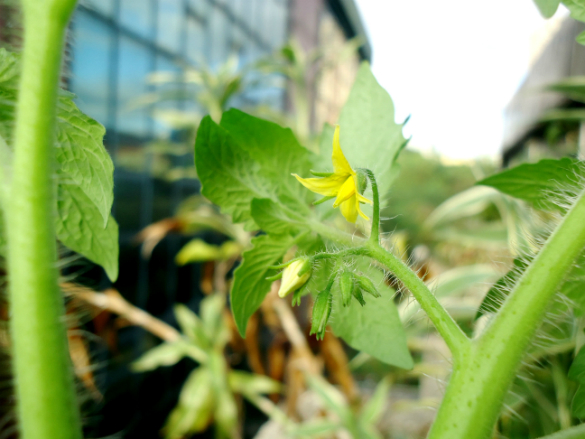
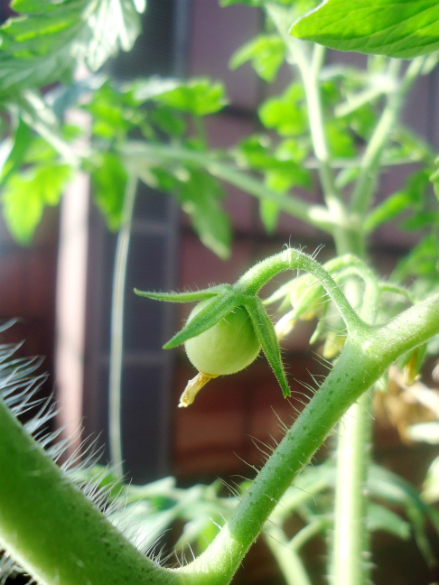
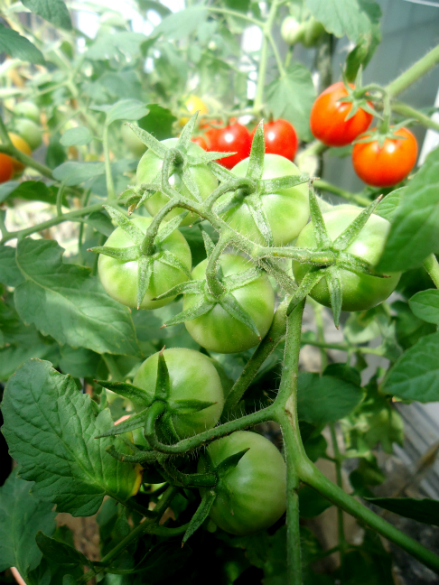
HARVESTING CHERRY TOMATOES
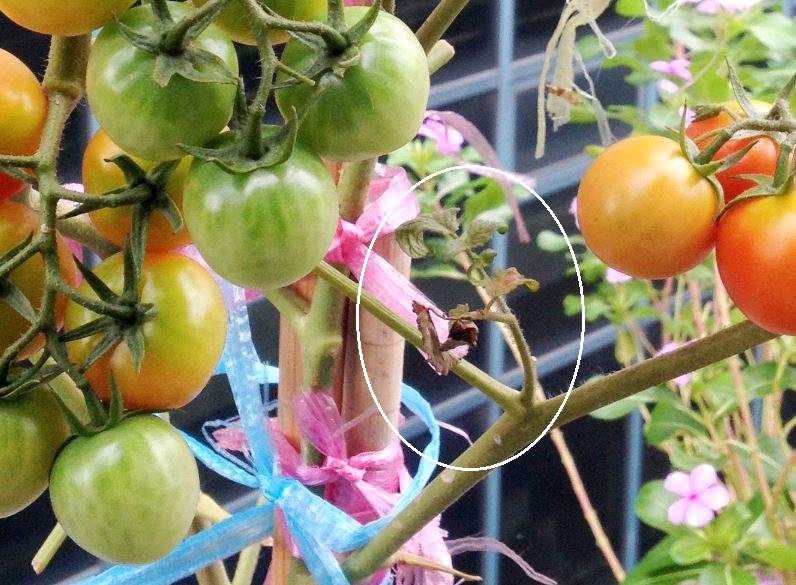
After around 2-3 months of growing your tomato plants, cherry tomato flowers will start to appear. Yay! When this happens, the plant will then concentrate all of its energy to produce the fruits. While waiting for the flowers to turn into cherry tomatoes, you’ll need to prune the plant every now and then to make sure that the energy of the plant is directed to the fruits and not to unnecessary stems and branches. Let me introduce to you, the “suckers” of the tomato plants. These suckers or small branches grow at a 45 degree angle in between two main branches. You’ll need to carefully pluck these off especially when your plant already has flowers because if you don’t, they will suck the energy produced by the plant and less energy will go to the flowers and fruits.
“Sucker” in tomato plants.
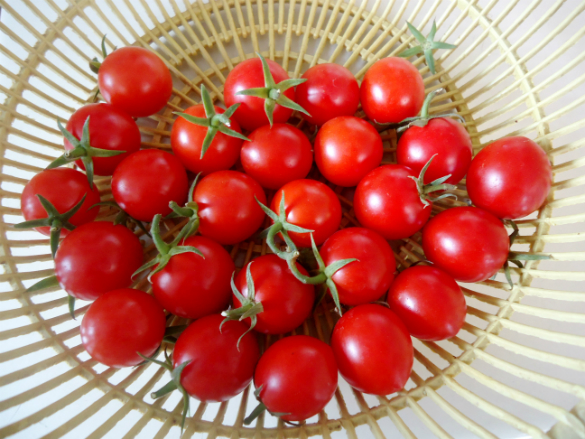
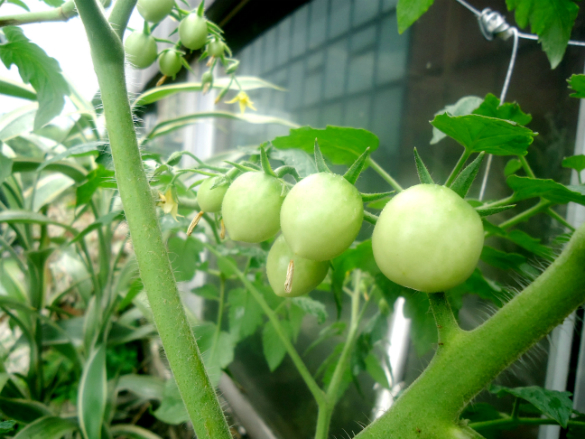
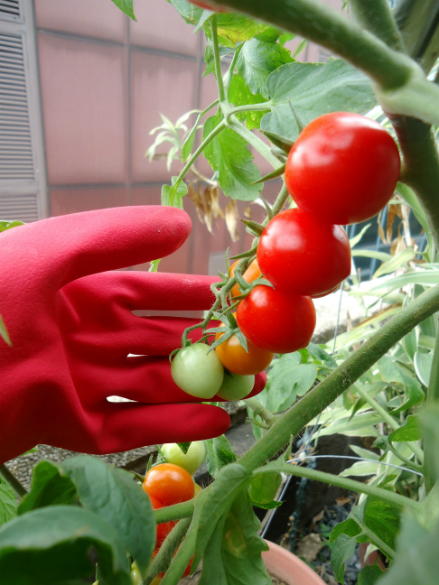
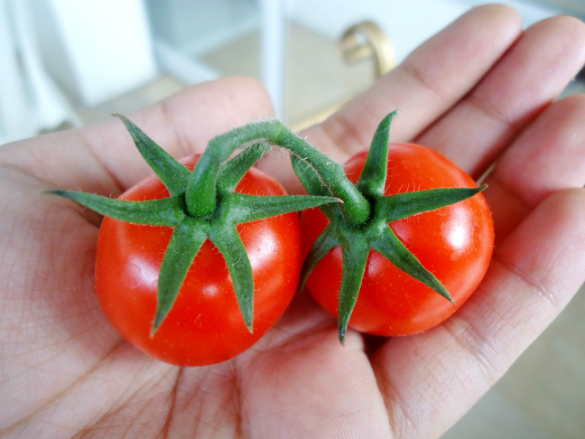
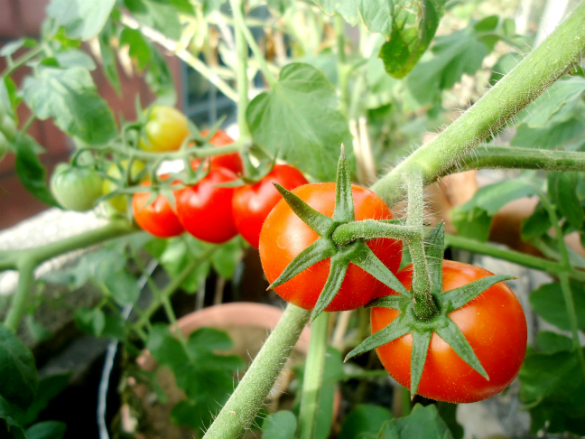
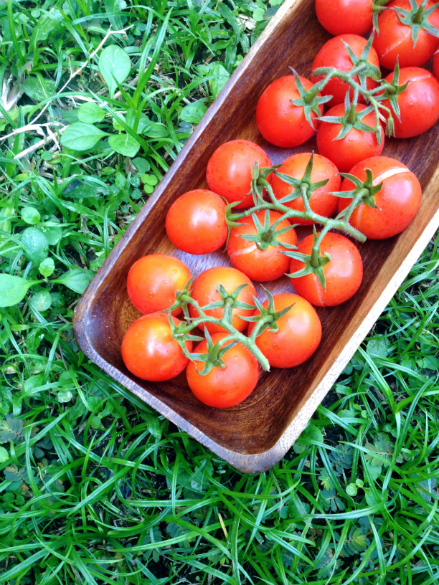
It usually takes 3-4 months before a cherry tomato plant bears fruit, depending on your location and weather. As soon as you see the yellow flowers, you’ll know that it’ll only take a few more weeks before you can harvest your homegrown, juicy, and sweet tomatoes. The tomatoes can still ripen after you’ve harvested them from the plant, but I like to keep mine in the vine just until they become red (not overripe) so that they can reach its maximum sweetness. To harvest the tomatoes, you can gently twist and turn each fruit until they come off or you may cut the individual stems of the tomatoes.
Cherry tomatoes
So, there you have it! :) I really hope that you can explore growing cherry tomatoes at home! It is definitely a fulfilling and fun thing to do. Gardening at home has helped me so much in learning more about nature, befriending earthworms, appreciating food, developing my character, learning from my mistakes, and being reminded of how amazing God is. It really is a privilege to witness seeds grow and produce fresh fruits and vegetables at home.
Happy gardening, everyone! Feel free to share your tomato gardening experiences with me too.
For more gardening updates and tips, feel free to visit the ff. pages of ANYONE CAN GARDEN. :)
My name is Nicole Obligacion and I started this blog because I was inspired by Hebrews 10:24 and Hebrews 3:13. I love to eat, cook, bake, read the Bible, and encourage. :)