How to Grow Melons in Containers

As mentioned in my previous post about melons , here are some things that we can take note of when we’re growing melons in containers. :)
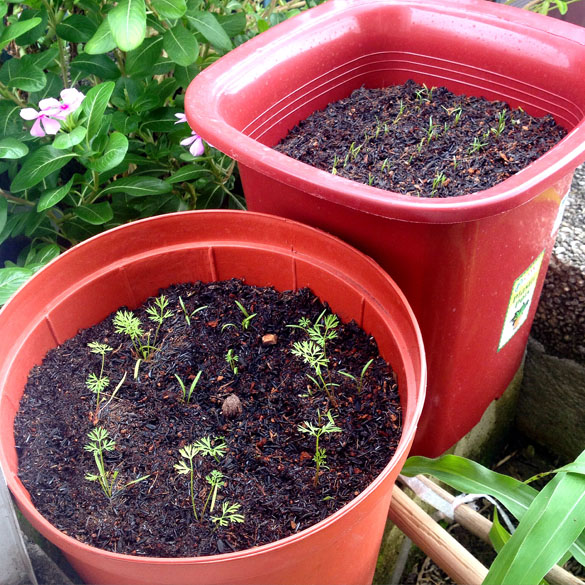
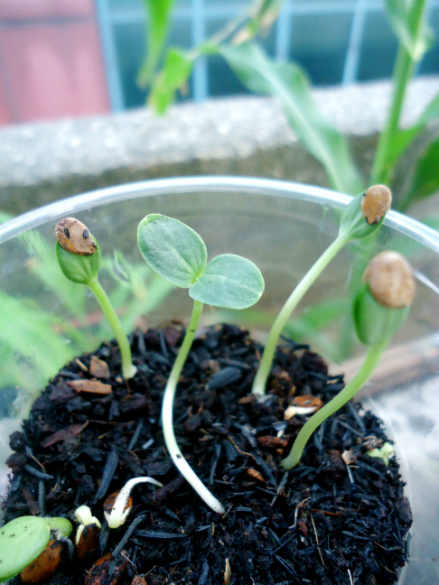
1. Grow Seedlings

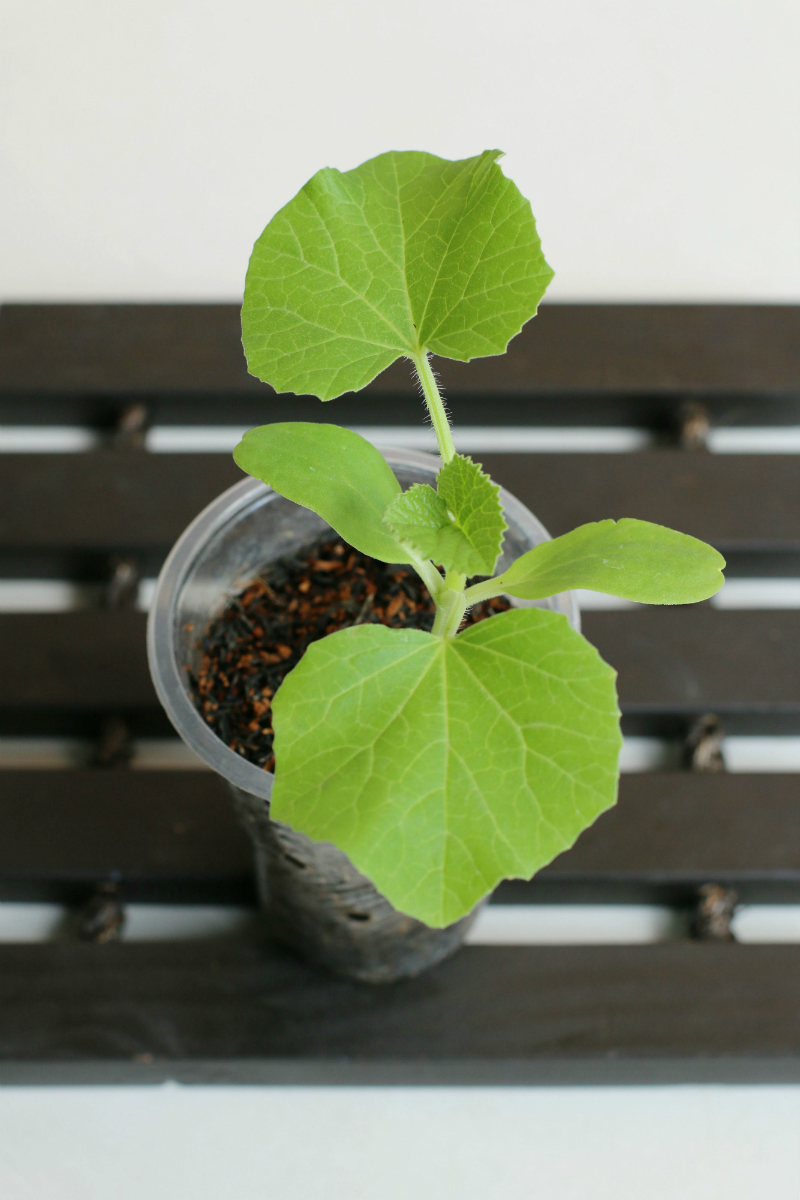
Start by planting seeds in small plastic cups filled with soil. It’s best to plant one seed in each cup for easier transplanting. Then, sprinkle fertilizer on the soil to help the seedling grow. After two weeks, it will most likely grow 4-5 inches long. By this time, you’ll see heart-shaped leaves (well, sort of) which have a furry texture.

how to grow melons (3) - Copy


2. Transfer to a Bigger Pot

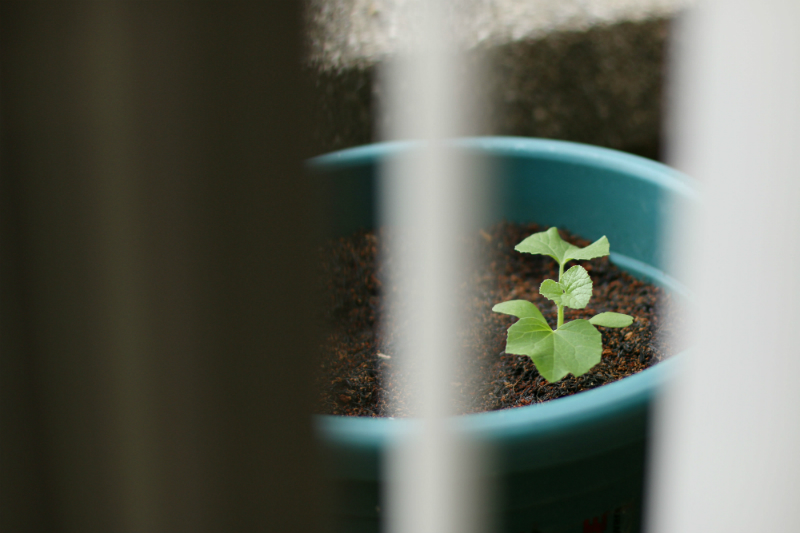
When the seedling is about 4 inches long, you may transplant it so its roots can grow deeper in a bigger bed or pot of soil. You may use a large pot that is 15” wide and 15” tall. Any pot or container with a similar or larger dimension is enough. Before carefully transferring the seedling, make sure to sprinkle fertilizer on the soil and mix thoroughly. I usually add 2-3 tablespoons of powdered organic fertilizer to loose soil.

how to grow melons (1) - Copy

One important factor to consider when transferring the seedling is being gentle with the roots. Transplanting can be very stressful for any plant, so try to do your best not to damage or cut the roots in the process. Also, once the seedling is placed in its new container, its roots must be covered with soil and mulch (e.g. dried leaves, hay, etc.). This will protect the roots from being exposed too much to the heat of the sun.

how to grow melons (4) - Copy


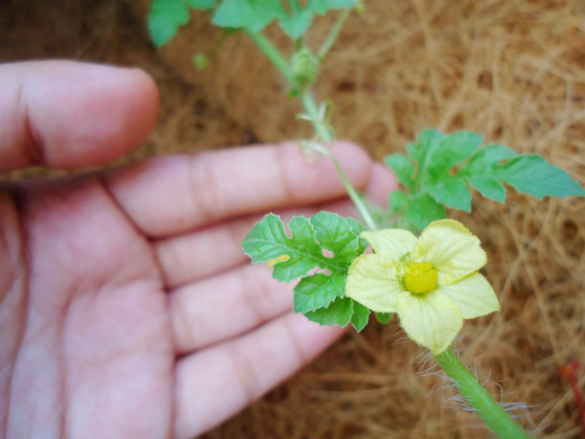
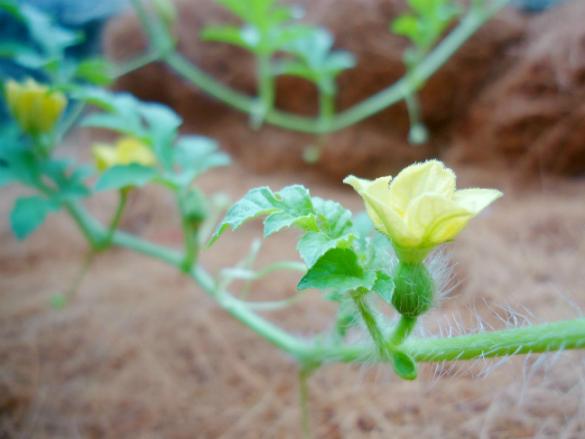
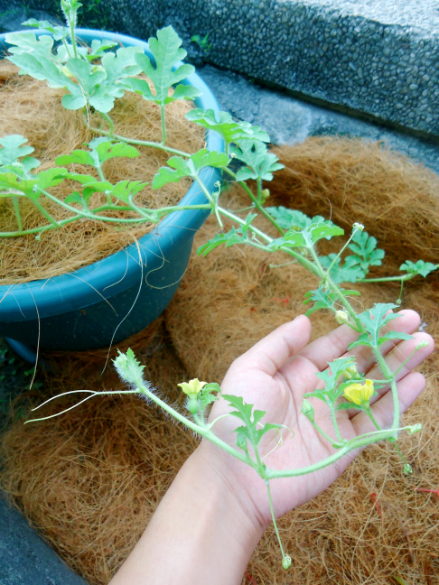
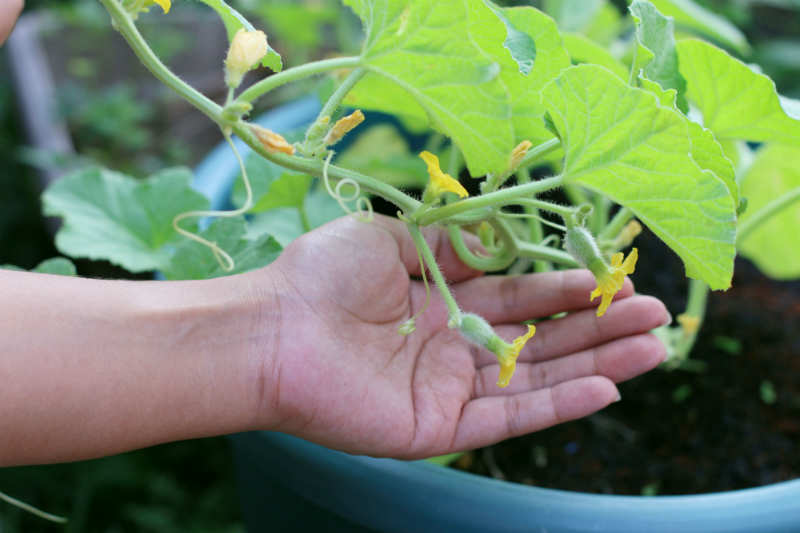
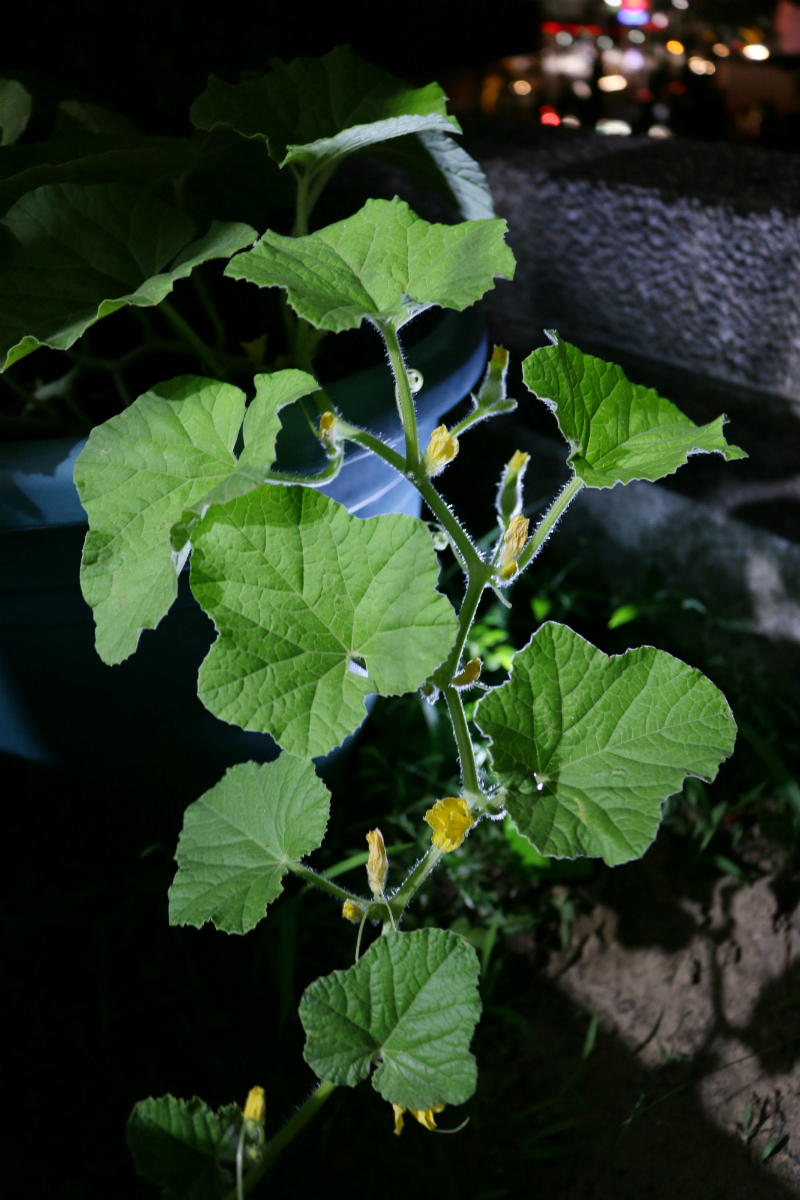
3. Watch Out for Flowers (Male and Female)

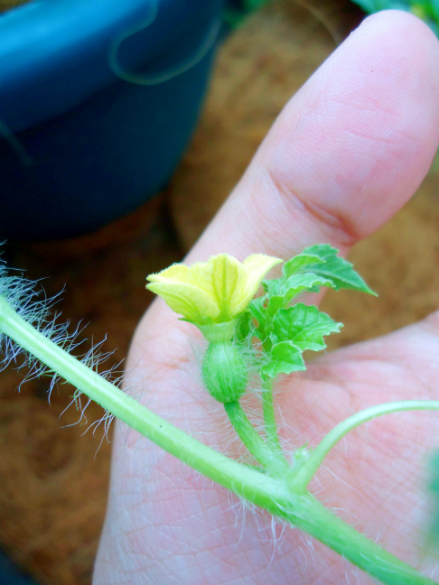
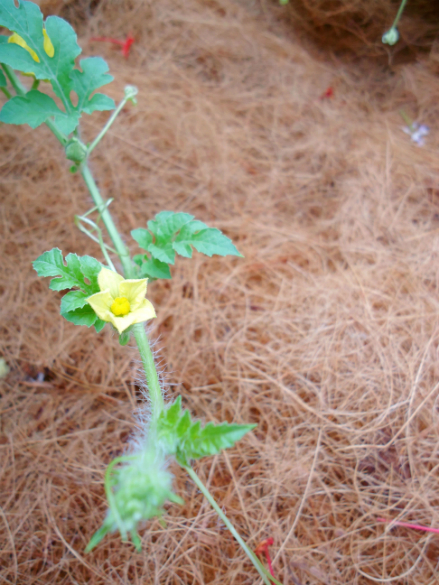
This is one unique trait of fruit-bearing vines. They grow male AND female flowers. The latter ones eventually become the fruit, when they are properly pollinated with the male flowers. It’s important to look out for the flowers when the plant is growing because the female flower only opens up for a few hours in its lifetime.

how to grow melons (7) - Copy

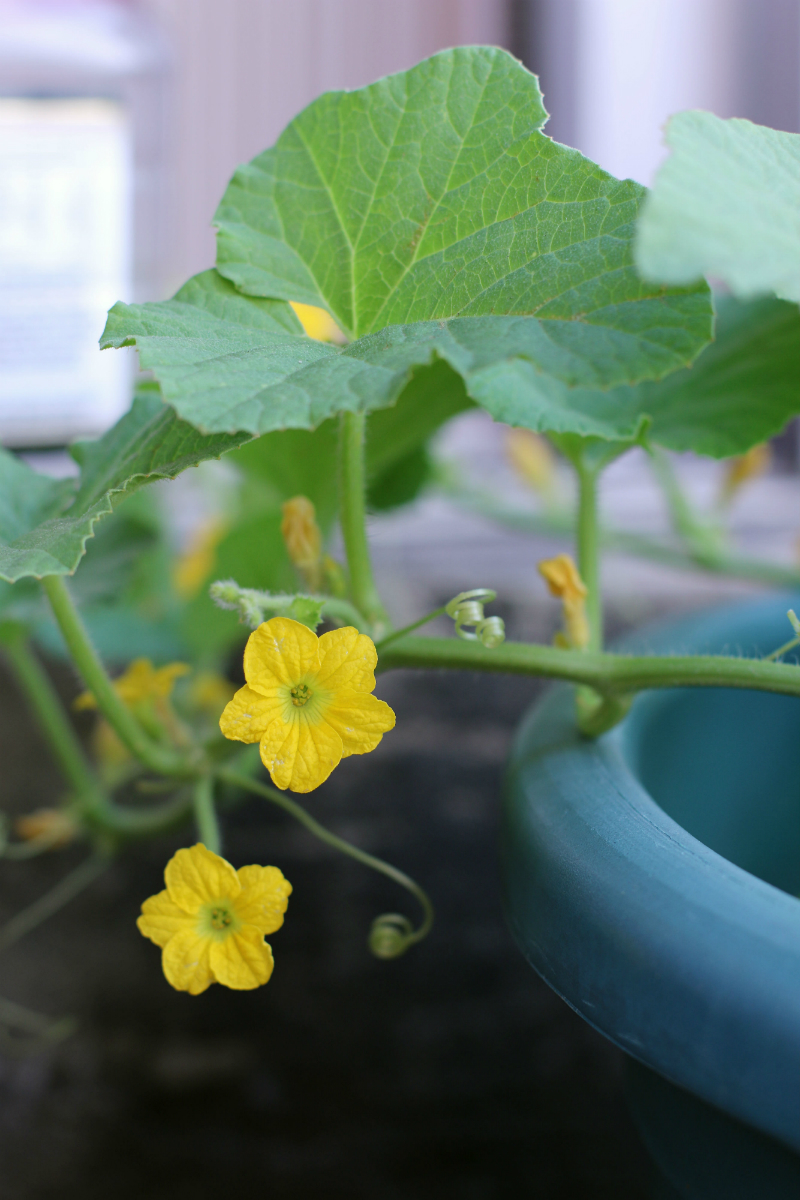
If you don’t get to transfer pollens from the male flower to the female flower, the fruit won’t grow. The male flowers will first appear and then, after a few days, female flowers will bloom too. The difference between the two is the flower’s stalk. The male flowers have a thin stalk; while the female flowers will have a rounded one, similar to having a small ball below the yellow petals.

how to grow melons (6) - Copy


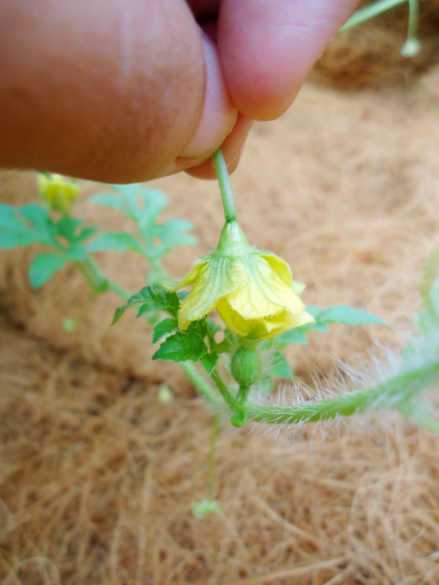
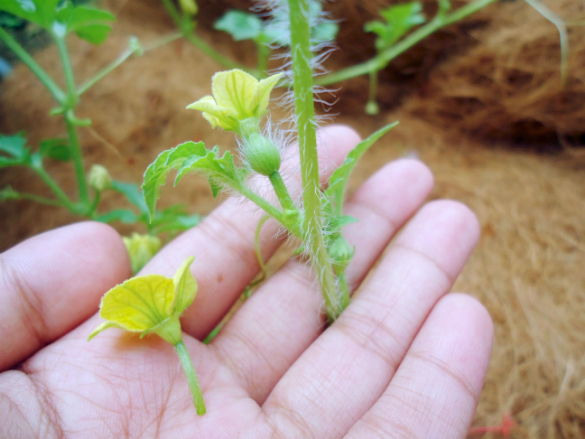
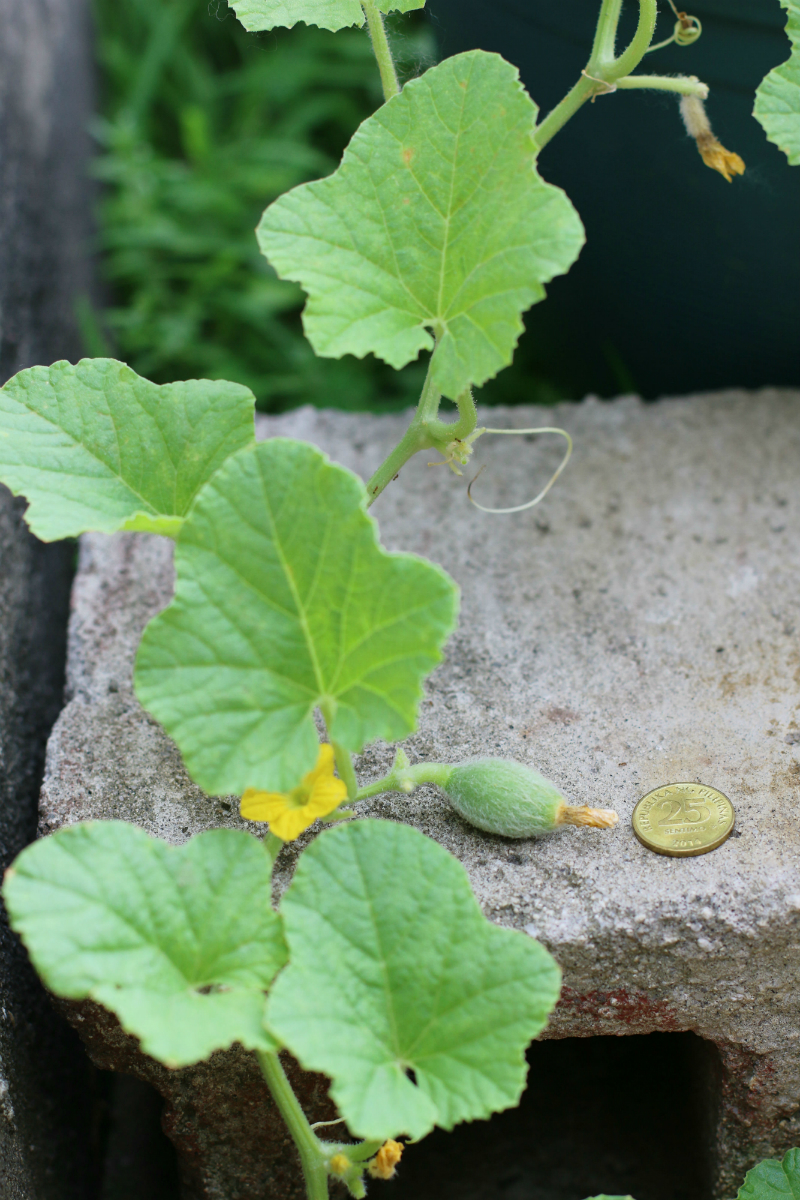
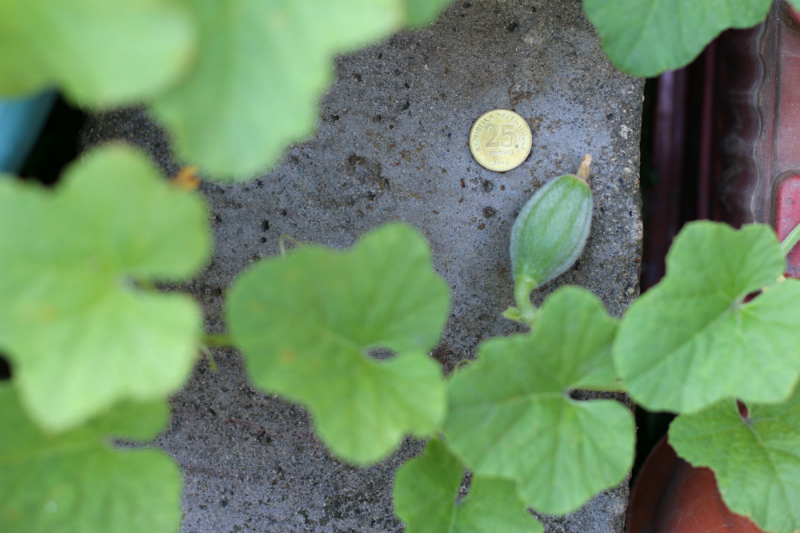
4. Pollinate by Hand

When the fruit-bearing vines are grown in larger areas like farms and fields, pollination is usually done by the bees. But, if we want to grow fruits from vines in smaller containers at home, it would require pollination by hand. How exactly do we pollinate by hand? It’s a simple process, but it can only be done when the female flower opens up. Once you see the petals of the female flower spread out, you can get one to three male flowers and remove its petals.

how to grow melons (8) - Copy

Our goal is to transfer the yellow dots (pollens) from the middle of the male flowers to the bud of the female flowers by carefully rubbing it against the latter. After a few hours, you’ll notice that the petals of the female flowers will start to close up and cover the bud. Then, in a few days, it will begin to form the fruit.

how to grow melons (5) - Copy


5. Fertilize and Water when needed

You can add fertilizer to the plant every time it goes through the different stages of growth (e.g. when the plant grows it leaves, longer stems, flowers, and fruits). Another option is to add fertilizer every two weeks. On the other hand, when it comes to watering the plant, you can water the plant once a day, depending on the weather in your area. Since it’s hot and humid in the Philippines (where I live), I usually water the plant once or twice a day. However, by the time the fruit matures, it’s best to lessen the water added to the plant’s soil. Overwatering may hinder the fruit from reaching its maximum sweetness.

how to grow melons (9) - Copy

how to grow melons (10) - Copy

how to grow melons (11) - Copy

how to grow melons (12) - Copy


6. Harvest

Melons that are ready for harvest will show the ff. signs:

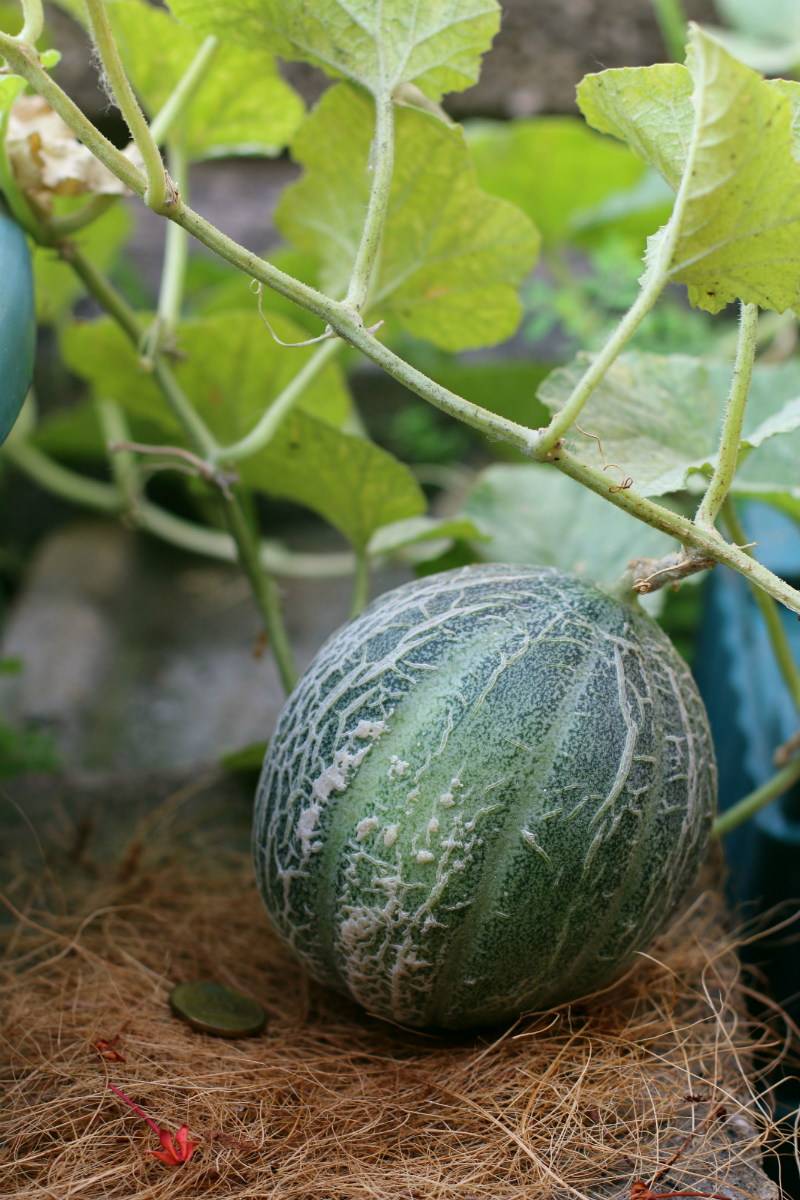
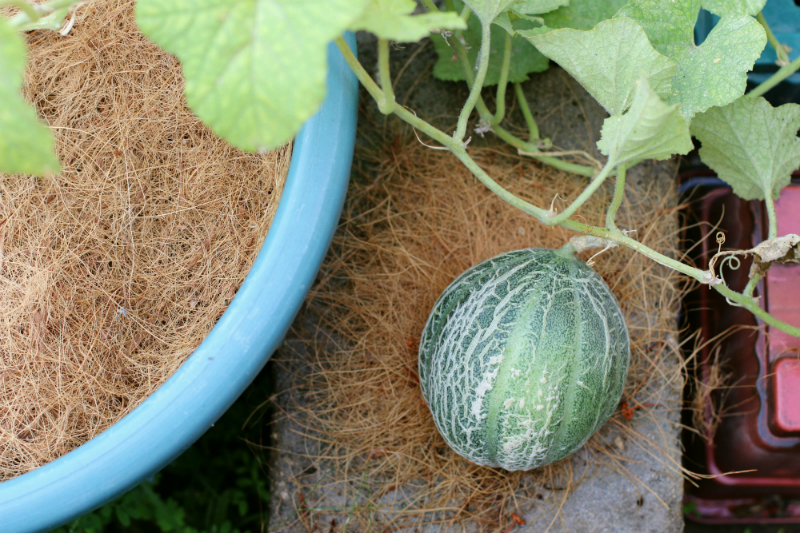
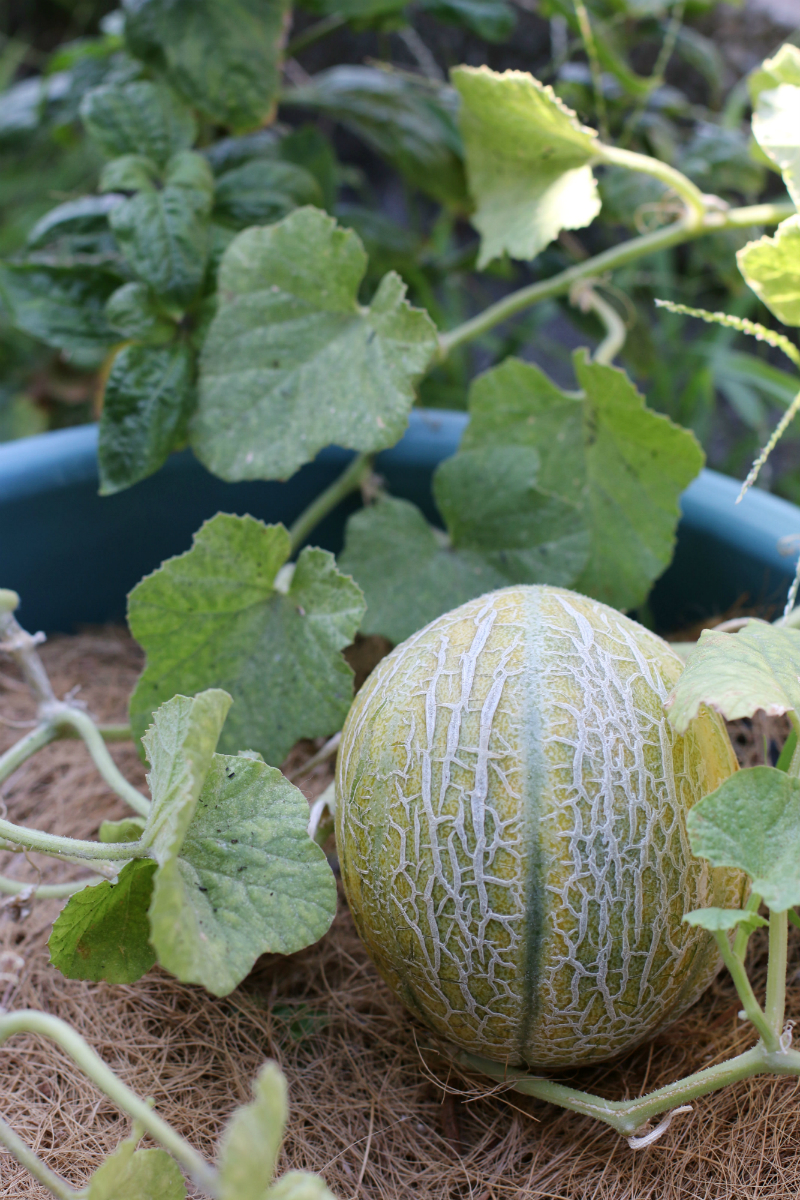
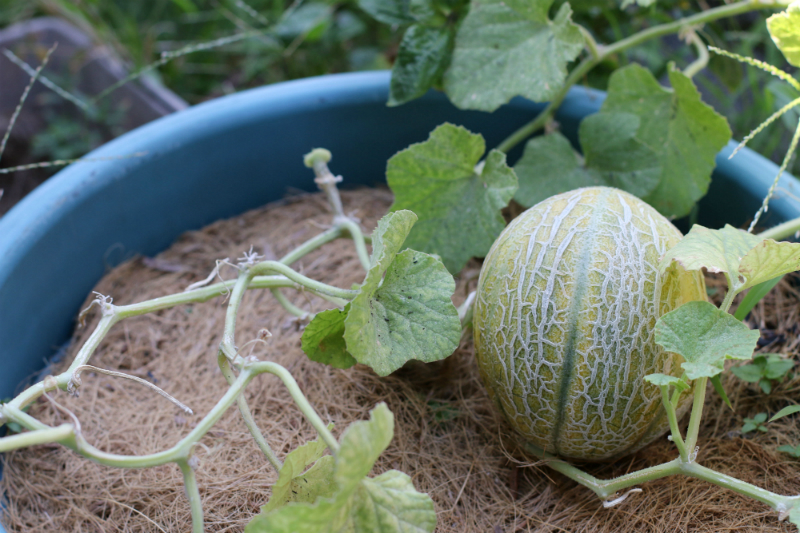
a. The color of the melon will turn from green to orange or yellow orange.

b. The fruit will have a sweet smell especially when you go closer to the stem of the fruit.

c. The stem will easily detach from the fruit when you slightly move the melon.

how to grow melons (14) - Copy

how to grow melons (13) - Copy

how to grow melons (18) - Copy

how to grow melons (16) - Copy

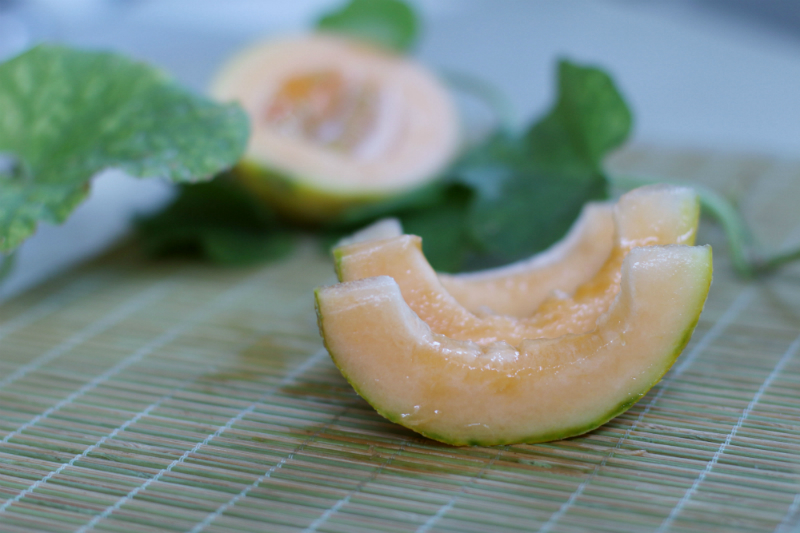
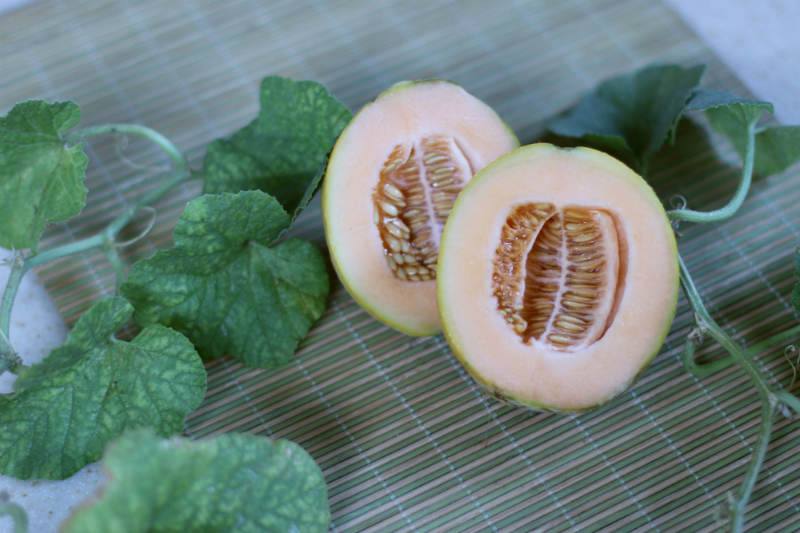
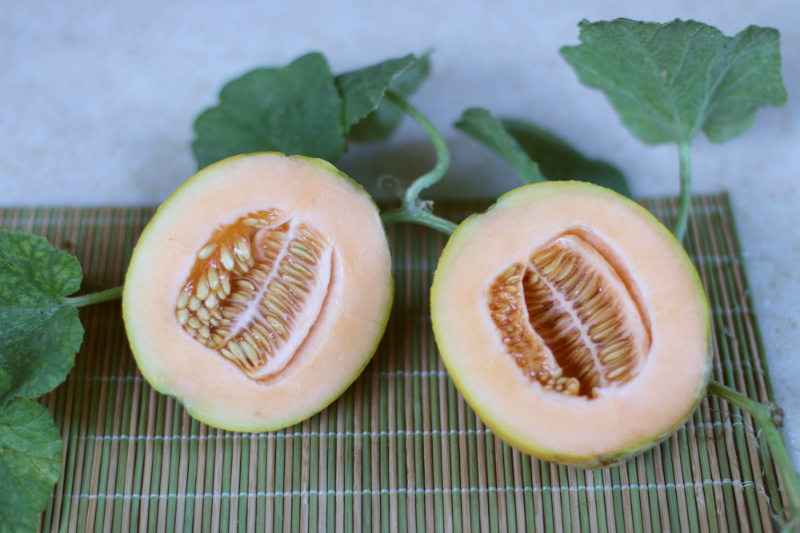
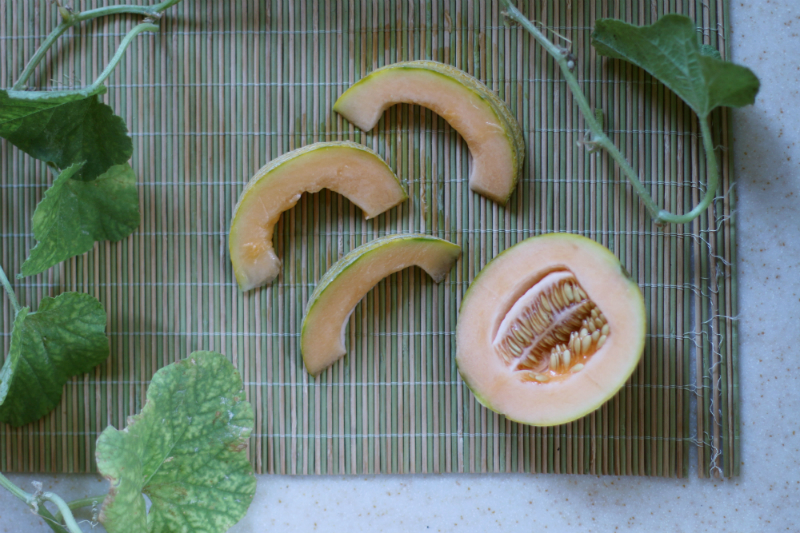
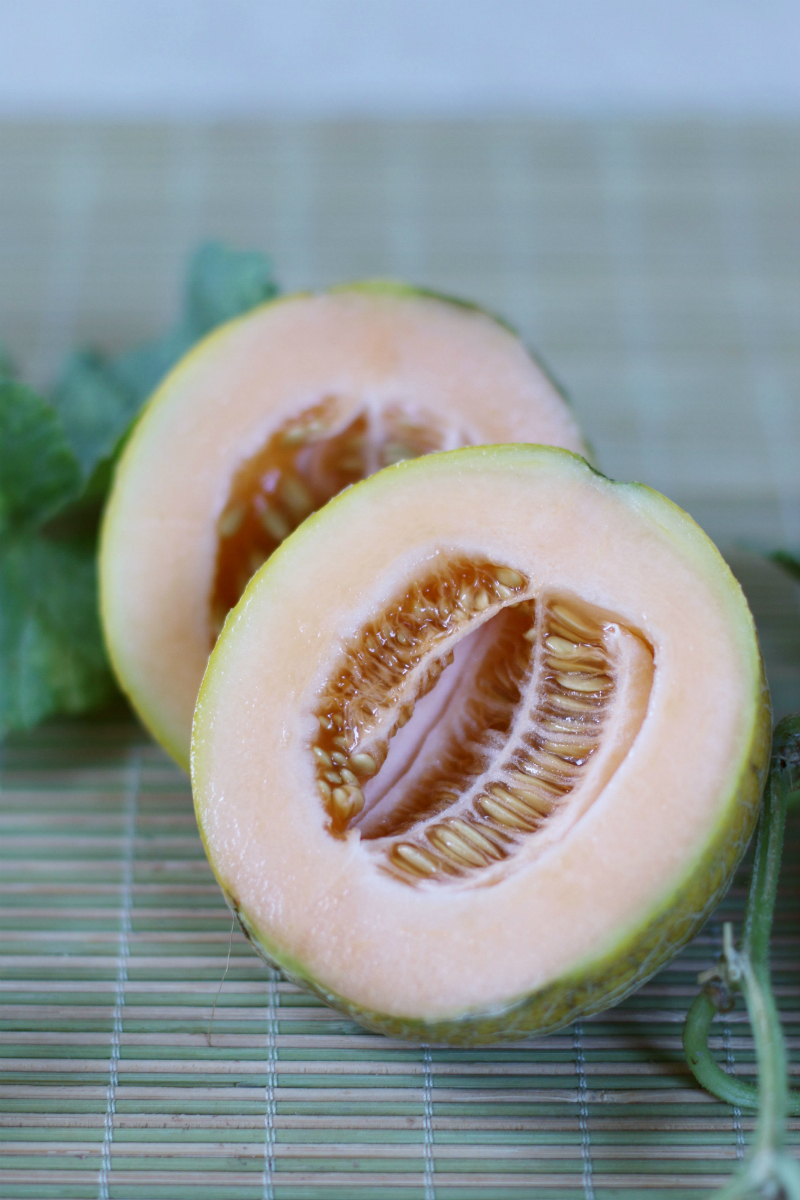
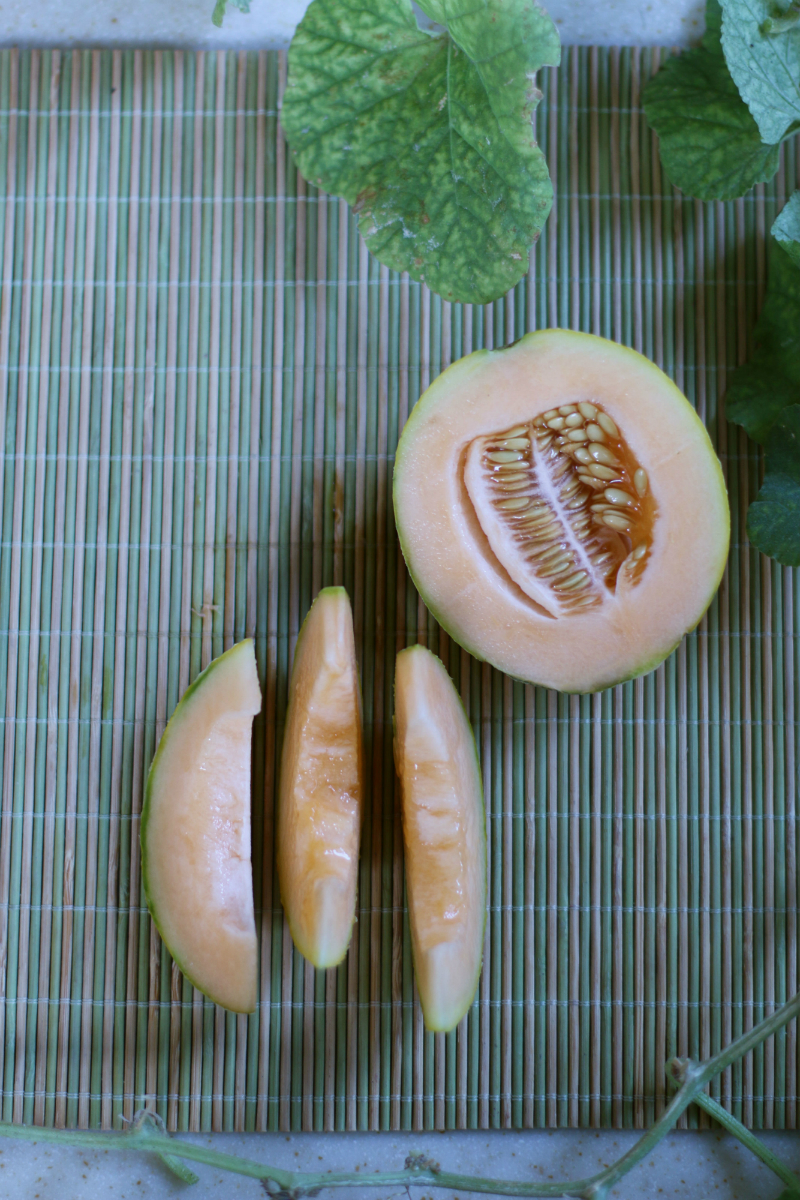
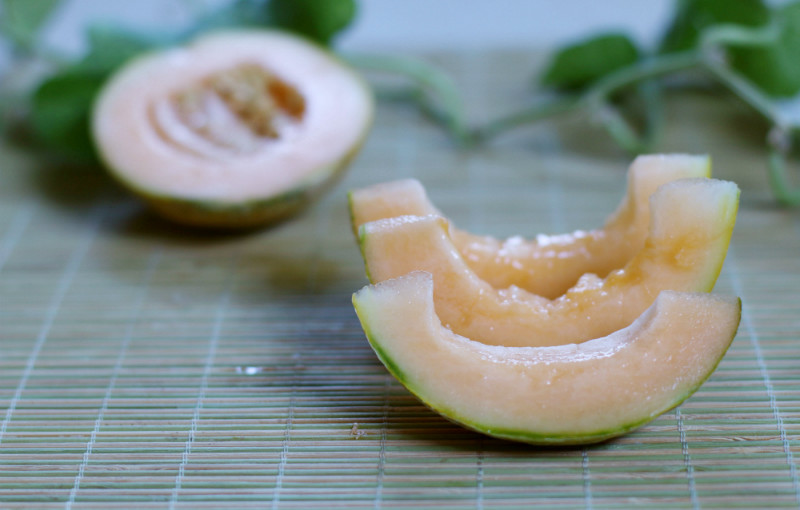
If you are into gardening, growing fruits from vines is a fun and challenging experience that I would recommend. There’s nothing like slicing a sweet, homegrown melon in half and seeing the seeds and juices flow on the chopping board. It was such a refreshing and delightful moment! If you would like to give it a try, I would encourage you to plant the seeds in January or February, so you can harvest it by March or April. Fruit-bearing vines don’t grow well during the rainy season. Hopefully, I can try to grow more early next year.


For more gardening updates and tips, feel free to visit the ff. pages of ANYONE CAN GARDEN. :)

Facebook

Instagram

how to grow melons (15) - Copy

how to grow melons (17) - Copy

how to grow melons (2) - Copy

how to grow melons (19) - Copy

how to grow melons (20) - Copy

How to Grow Carrots at Home

“Don’t give up in doubt what you planted in faith.”- Elisabeth Elliot

I read this statement while I was browsing through some photos online. It reminded me so much of my experience with planting and harvesting carrots at home. It was my first time to plant a type of vegetable that grows underneath the soil, which made harvesting more faith-stretching for me. As usual, I bought the carrot seeds from “Seeds of Hope” which can be found at any SM Supermarket. They also sell the seeds at Ace hardware or at the gardening stores at the entrance of SM Megamall (building A).

carrots
carrots

After months of waiting, by God’s grace, I finally had the privilege of harvesting my own carrots at home. Woohoo! Even though they didn’t reach their maximum size, they were still a sweet surprise (literally too). Hopefully, I can grow a second batch early next year. Personally, I think that growing carrots is easier than growing TOMATOES and CORN at home. I can’t wait to grow more soon! As always, gardening at home helps me appreciate the crops and our Creator more. It really is an amazing experience to see fruits and vegetables grow from tiny seeds. Tasting our homegrown crops still is quite mind-blowing. I really am grateful for the experience, which is why I want to encourage you to try it too! If you’re already growing carrots or other fruits/vegetables, let me know! Leave a comment below and share your gardening experience!

carrots
carrots


Tips on Growing Carrots at Home:

1.Use loose potting soil. It will help produce straight carrots since they won’t have to struggle growing through thick, hard, and rocky soil.

carrots
carrots

2. Plant the carrot seeds directly on the permanent container pot/bed. They don’t like growing in small plastic cups or nursery beds. They also don’t like being transplanted.

IMG_9412

3. Plant them in rows. The stems of the carrot plants are very fragile. So, planting several seeds beside each other will help in giving support to the batch of plants. This will also help you differentiate the carrot plants from weeds growing in the same pot/bed.

IMG_1088

4. Spray water lightly on the soil until water comes out of the pot’s holes or until the whole soil area is moist.

carrots
carrots

5. Use fertilizer every two to three weeks. I use Jobe’s organic fertilizer spikes for my vegetables.

carrots
carrots

6. When the seedlings grow 2-3 inches tall, start trimming the weaker plants in the rows. Unfortunately, we need to let go of some of the plants because we don’t want to overcrowd the soil with too many roots. Overcrowding will lead to producing smaller and intertwined carrots. (Although having intertwined carrots or carrots with legs can be cool, sometimes.)

carrots
carrots

7. You can help the stems and leaves grow upright by carefully and lightly tying them together. You can use plastic straws (strings).

carrots
carrots

8. When you see carrot tops peeking out of the soil, cover them with more loose potting soil. When the carrots are exposed to too much sunlight, their tops may turn to green.

IMG_0792

9. It usually takes three months before the carrots can be harvested. A good indication is when the stems are already 12 inches high.

carrots
carrots

10. Harvest the carrots when you’re ready to eat or cook them. Crops harvested lose their natural sweetness as the days go by.

carrots
carrots
carrots
carrots


I hope you can join me in growing something green! ‘Til my next carrot experience. :)


For more gardening updates and tips, feel free to visit the ff. pages of ANYONE CAN GARDEN. :)

Facebook

Instagram

God is Always on Time

I have recently embarked on a new gardening adventure at home. By faith, I am growing watermelon vines in a container bed! Yay! It all started when I was eating a slice of sweet watermelon in the cafeteria at work. My colleague and I were talking about some of the vegetables I’ve planted and I made a joke about planting the watermelon seeds from the slice of fruit that I was eating. Nonetheless, I went home that day with a small container filled with seeds and I planted them in a cup of soil. I really enjoy planting and growing seeds because I get to experience the privilege of knowing God more and I get to witness the seeds grow and bear fruit. I still have a couple of months to go before I harvest (by faith!) sweet watermelons. But, for now, I would like to share more about what I am learning from the vines I’m currently growing and how I am encouraged by God — who is always on time.

Watermelon vine
Watermelon vine

About a week after I planted the seeds, I came home from an out-of-town trip with friends and I remember checking my plants first before I slept that afternoon. To my surprise, I saw several sprouts growing in the cup where I planted the watermelon seeds! The sprouts looked so sturdy compared to the other fruit/vegetable sprouts I’ve grown. Also, they were beautifully long and happy. They even had the brown watermelon seeds attached to the leaves which gave me the assurance that they weren’t just weeds.

watermelon seedlings

When the sprouts grew bigger, I transferred them to a larger bed. Every day for five weeks, I watered the plants and provided fertilizer and mulch to help them grow. Taking care of vines at home is pretty exciting especially since it’s my first time to grow them. As I studied the different stages that the vine goes through, I learned that watermelon plants have male and female flowers too. When I found out about it, I remembered how my corn plants also had male and female flowers and how they also needed to be pollinated by hand in order for them to produce kernels of corn.

Pollinating the male and female watermelon flowers by hand.

However, the main difference between pollinating corn plants and watermelon flowers is the TIMING. Yes, for both plants, it is advisable to pollinate in the morning so that the sun’s heat can help activate the pollens once they touch the female flowers. BUT, corn plants can be pollinated everyday for a week since the tassels can produce pollens for days. If you missed a day, you can still pollinate the corn plant the next day. On the other hand, for the watermelon vines, the female flower opens its petals for only ONE DAY. If we don’t get to brush the pollens from the male flower to the female flower in the morning on the only day it opens up, the watermelon fruit from that female flower won’t grow. It will only dry up and die.

Talk about PRESSURE. Haha.

watermelon vine
watermelon vine

Last June 28, I saw the first few male flowers growing on the vines. Every day after that, 1-2 male flowers would grow and then, dry up. I was already starting to panic because more and more male flowers were growing and I knew that in a few days, the female flowers would then start to appear and open its petals for only a day. Finally, two days later, the first female flower appeared. You could tell that it was a female one since it had a small watermelon-like body below its petals. The male flowers only had a thin stem. But since the petals of the female flower weren’t open yet, I had to wait until the morning to pollinate them.

Male and female flowers of the watermelon vine.

Before I slept that night, I remember thinking about it and telling God “What if it doesn’t open tomorrow morning before I leave for work? What if it opens when I’m already out of the house? If that happens, I’ll miss out on pollinating the flowers and the fruit won’t grow!” I guess it was nerve-racking for me because after weeks of taking care of the vines, as much as possible, I really would want them to bear fruit. So, I prayed about it that night and surrendered the concern to God. If He wanted it to happen, I knew that He would allow me to pollinate in the morning.

Watermelon vine's female flower
Watermelon vine’s female flower

When I woke up the next day, I rushed to our veranda (where the vines were) and I saw that the female flower had already bloomed. Oh my goodness. It was time! By God’s grace, the flower opened its petals early and I had the opportunity and time to pollinate it! It only took a few seconds, but the future of the watermelon fruit greatly depended on it. Haha.

After pollinating the flower and watering the plants, I was ready to take a shower and go to work. However, while I was preparing my clothes, my mom informed me that there were some concerns with our transportation. To make the long story short, my sisters and I needed to help each other and my dad go to our respective destinations that morning using only one car. Because of the slight delay, I knew that I was going to go to work at a later time. So, while waiting, I decided to make good use of the extra time that I had at home. I ended up making a temporary cover/shield to protect the seedlings and plants from heavy rains, which was something that I couldn’t do in the evening.

watermelon vine
watermelon vine

After about an hour, my sister graciously drove me to work and I remember thanking God in my heart for His perfect timing that morning. Even though I was worrying about the flowers the night before, He gave me peace to trust in Him and to wait on His best timing the next day. He certainly knows how to grow watermelon vines. He created them! So, I really didn’t have any reason to worry about not being able to pollinate on time or not being able to grow fruits from the vines.

I started the day with a grateful heart because I was encouraged by God to always trust in His perfect timing even when things don’t make sense or when I am faced with the unknown. God can and He will do anything if He thinks it’s for the best.

“Faith in God includes faith in His timing.” –Neal Maxwell

Male and female flowers. Watermelon vine.

When I went home that night, an interesting thing happened. It suddenly rained after a hot day. It didn’t rain in the morning while I was pollinating the flowers. It also didn’t rain while I was preparing the covers and shields for the plants. But, by God’s grace and in His perfect timing, it rained at night when everything was done and alright.

“But blessed is the one who trusts in the Lord,
whose confidence is in him.
 They will be like a tree planted by the water
that sends out its roots by the stream.
It does not fear when heat comes;
its leaves are always green.
It has no worries in a year of drought
and never fails to bear fruit.”

[Jeremiah 17:7-8]

watermelon female flower

Encourage yourself one treat at a time. :)

Growing Sweet Corn at Home

The first thought that entered my mind when I had the idea of growing corn at home was: “Nicole, you have got to be crazy.” Hahaha. Even some of my friends told me that it was a funny and crazy thing to do. Maybe I WAS crazy because sweet corn is usually grown in fields, not in verandas at home. But, by faith, I still planted seeds of corn and attempted to grow them in the city.

sweet corn
sweet corn

For the first month and a half, everything was going “according to plan”. The seedlings were growing beautifully, the corn plants grew taller each week, and there were no bugs or pests around them. It was also during this time that my first two corn plants produced ears of corn. Compared to my other fruit-bearing plants, this type of plant grew really fast. In fact, after I got back home from an out-of-town, weekend trip, my family told me that the ears of corn grew strands of silk hair. I didn’t expect the plants to grow fast, but they did!

sweet corn silk hair
pollen from tassels
pollen from tassels

After reading numerous websites on growing corn, I found out that, ideally, corn stalks should be grown in a relatively large area since the more corn stalks there are in an area, the better the cross-pollination will be (which would result to producing kernels in the corn). I also learned that each silk hair is connected to a potential kernel and it must be properly pollinated in order for the kernel to grow. Since I live in the city and we only have a limited space to grow plants, my plants couldn’t cross-pollinate, so I needed to pollinate them by hand. I had faith that God can make them grow in our veranda, but honestly, there were times when I would worry about it. Nonetheless, I continued to water and pollinate them everyday.

hand-pollination on sweet corn plants

Unfortunately, while I was pollinating the corn plants one day, I made a mistake by covering the tassels too long which resulted to the tassels being wet and useless. I wanted to cover the tassels with a plastic bag so that I could collect more pollen overnight instead of manually shaking them off. However, as a result of my carelessness, the bag got moist and the tassels were drenched. They couldn’t produce pollen anymore which meant that my ears of corn would most probably grow without kernels.

IMG_8876

You could just imagine how devastated I was. I spent the past two months watering the plants twice a day and I did my best to take care of them. But, I couldn’t undo my carelessness, I couldn’t force my plants to produce pollen again. I felt so discouraged and annoyed at myself. But, by God’s grace, I still had a third corn plant growing beside the other two corn plants. Thankfully, this third plant was a late bloomer. It only developed its tassels and ear when the other two corn plants’ ears were already big. As I looked at the third plant, I noticed that its tassels were generously producing pollen. I then thought of transferring the pollen from that plant to the other two plants. However, I also knew that if I use up the limited pollens of the third plant, there won’t be pollens left for that plant’s ears.

sweet corn
sweet corn

I had to make a decision fast because I only had a number of days because the ears of corn reach their full growth. After praying and thinking about it, I decided to sacrifice the life of the ear of corn in the third plant and I used its pollens to help grow kernels in the first two plants. After five days, the third plant’s tassels stopped producing pollen and the tedious hand-pollination process was finally over. All I had to do was to continue watering the plant and hope that the pollens in them would help grow kernels.

sweet corn
sweet corn

About a week later, I checked the plants to see if they were ready for harvest. To know if the corn is ready for harvest, you have to check these three things: 1.) The silk hair must be dry and brown. 2.) The ear must be plump. 3.) When you poke a kernel found at the top of the ear, it must squirt out a milky liquid, not a clear one. By God’s grace, both ears of corn passed the test! After two and a half months, they were ready for harvest!

sweet corn
sweet corn
sweet corn
sweet corn

I couldn’t believe it was finally happening. I felt hopeful and nervous at the same time because it was my first time to grow corn. With a grateful heart, I harvested two ears of corn last May 22 and thanked God for the awesome privilege of growing corn at home. I slowly peeled the layers of leaves and strands of silk hair away from the cobs of corn and I saw beautiful, yellow kernels. Man, that moment was priceless. Although one of the ears of corn had only 85% of its kernels and the other ear only had 95%, it was still such a delight to see them grow. Suddenly, impossible things didn’t seem so impossible after all.

sweet corn
sweet corn
sweet corn
sweet corn

While I was enjoying the moment, I saw the third corn plant in the veranda. I then remembered that because of my mistake, the third plant needed to give up the life of its ear in order for the ears of the first two plants to grow. I shared this to my mom that morning and she told me that it reminded her of Jesus’ sacrifice. It all made sense. When I made a mistake a few weeks ago by leaving the plastic bags on the tassels too long, I couldn’t understand why God allowed it to happen. It was so discouraging to make a costly mistake during the most crucial period of the corn plants’ growth. But, now I know that He had a purpose for it. He wanted me to remember the sacrifice that He did thousands of years ago when He sent His Son, Jesus, to die on the cross and to rise again just so we could have eternal life with Him in Heaven.

sweet corn
sweet corn
sweet corn
sweet corn

“For God so loved the world, that he gave his only Son, that whoever believes in him should not perish but have eternal life.” –John 3:16

I made a mistake while I was gardening and I definitely couldn’t reverse what I’ve done or save the plants on my own strength. But, God, in His perfect timing, provided a way for me to still pollinate the plants and enjoy its fruit. In the same way, God constantly reminds me that He already made a way for us through Jesus. Because of Him, I know that I have been redeemed from my past wrongdoings; I have been set free from the slavery of sin, and I have been given the privilege of drawing closer to God each day — until eternity.

sweet corn
sweet corn
sweet corn
sweet corn
sweet corn
sweet corn

Some say that it is crazy and impossible to grow corn in the city. Some say that it is hopeless and impossible for messed up lives and broken hearts to be restored and renewed. But, I am reminded that we can put our hope and trust in Jesus and what He says in His word: “With man this is impossible, but with God all things are possible.” (Matthew 19:26)

Are there seemingly impossible situations in your life right now? I encourage you to lift them up to God, to do your part, and to relax as you witness Him work in ways that we can never imagine.

sweet corn
sweet corn
sweet corn
sweet corn

 “There is strength knowing I belong to the One who’s making all things possible. My God is strong and mighty. My God is faithful. My hope is in the Lord for He is able.” –Mark Schultz

sweet corn
sweet corn
sweet corn
sweet corn
sweet corn
sweet corn


For more gardening updates and tips, feel free to visit the ff. pages of ANYONE CAN GARDEN. :)

Facebook

Instagram

Subscribe to Blog via Email

Enter your email address to subscribe to this blog and receive notifications of new posts by email.

About Me

My name is Nicole Obligacion and I started this blog because I was inspired by Hebrews 10:24 and Hebrews 3:13. I love to eat, cook, bake, read the Bible, and encourage. :)

copyright © 2012 - 2024 encouragingtreats.com this site is designed, managed and optimized by sean si of seo hacker