How to Grow Okra in Containers

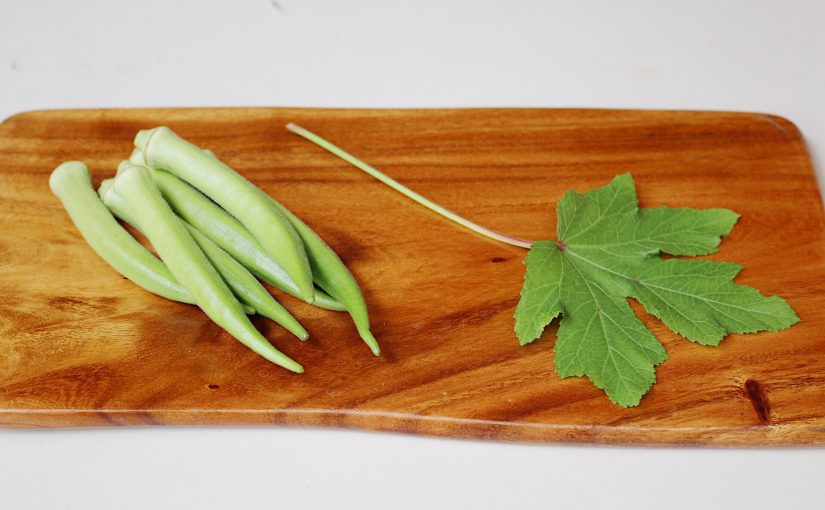
Out of all the vegetables I’ve planted at home, so far, okra was the easiest and the most fruitful plant that grew in a few months. From two plants in containers, I was able to harvest more than a hundred okra pods! Woohoo!

I’ll be sharing some of the photos and tips throughout the process. Hopefully, you can grow some too!

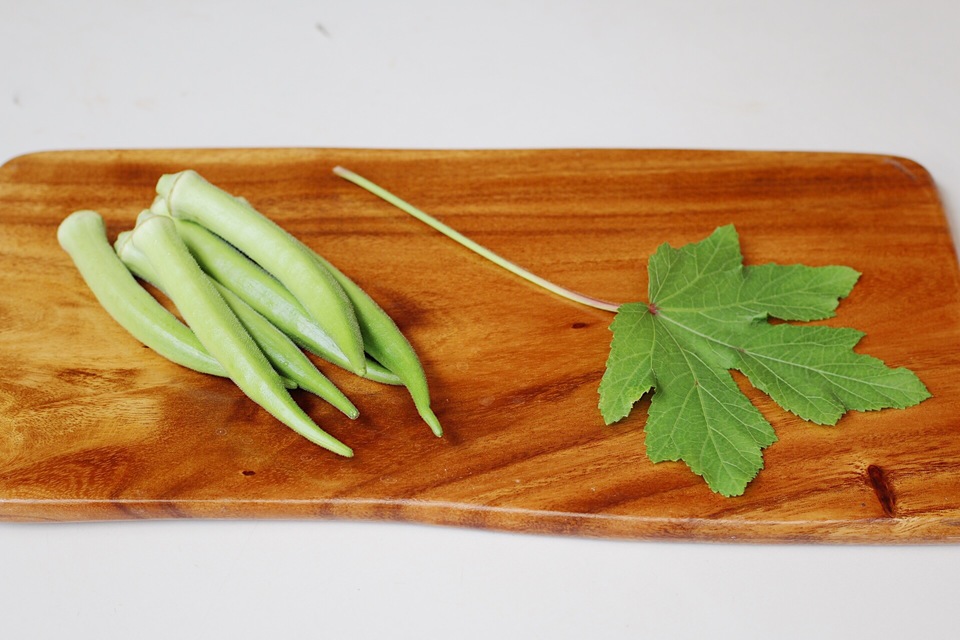
Most of my family and friends don’t like this slimy vegetable, but I think through time, people will learn to love it and its health benefits. It’s also one of the vegetables that help fight diabetes. Cool, right?

How to Grow Okra in Containers:

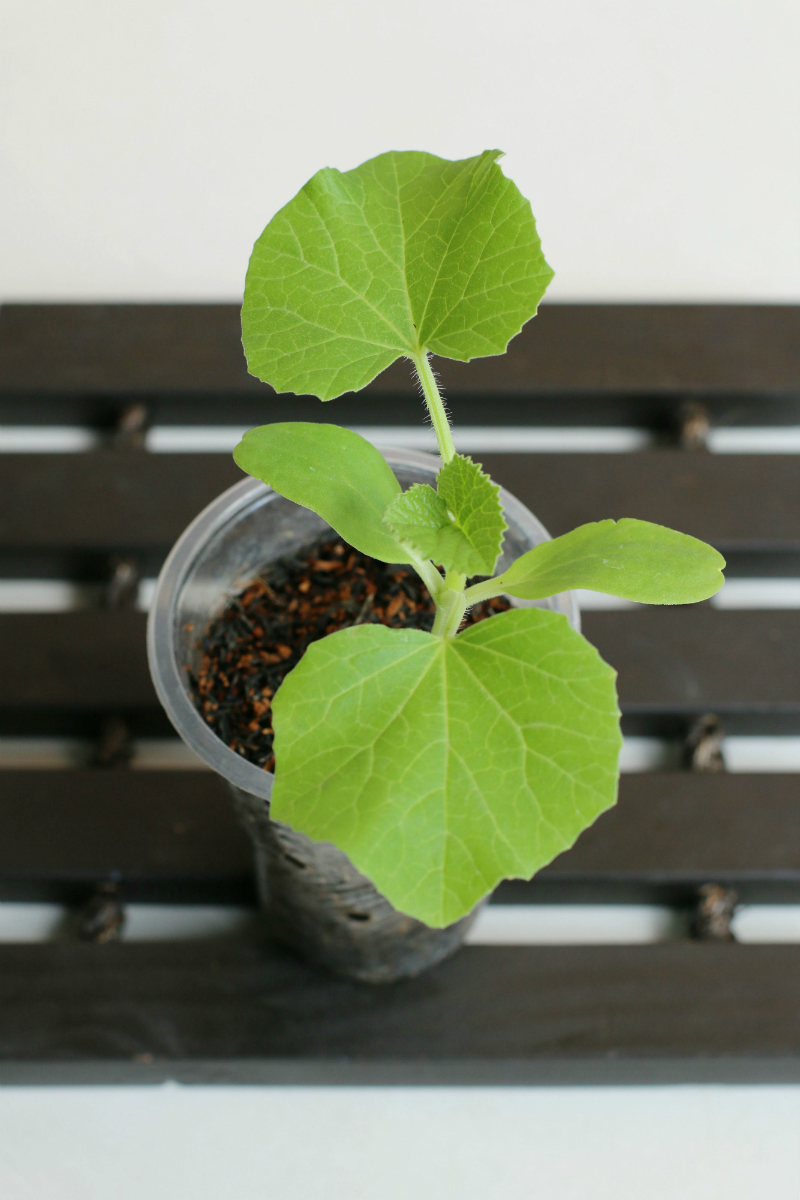
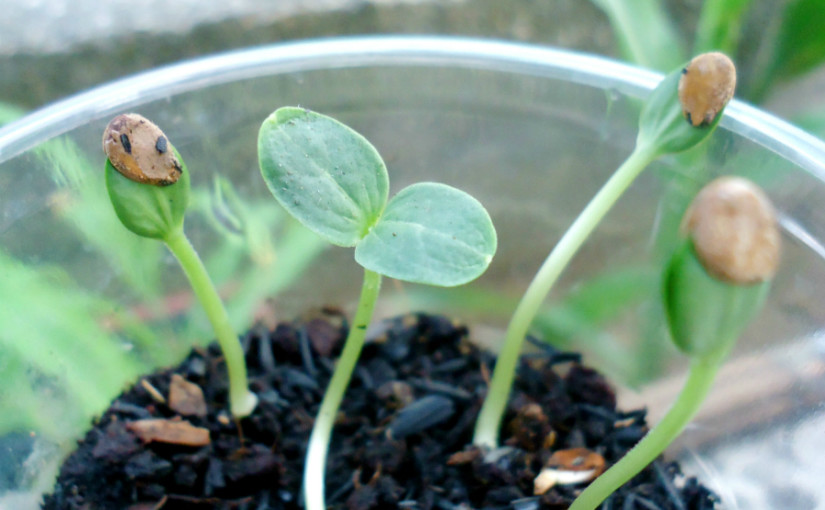
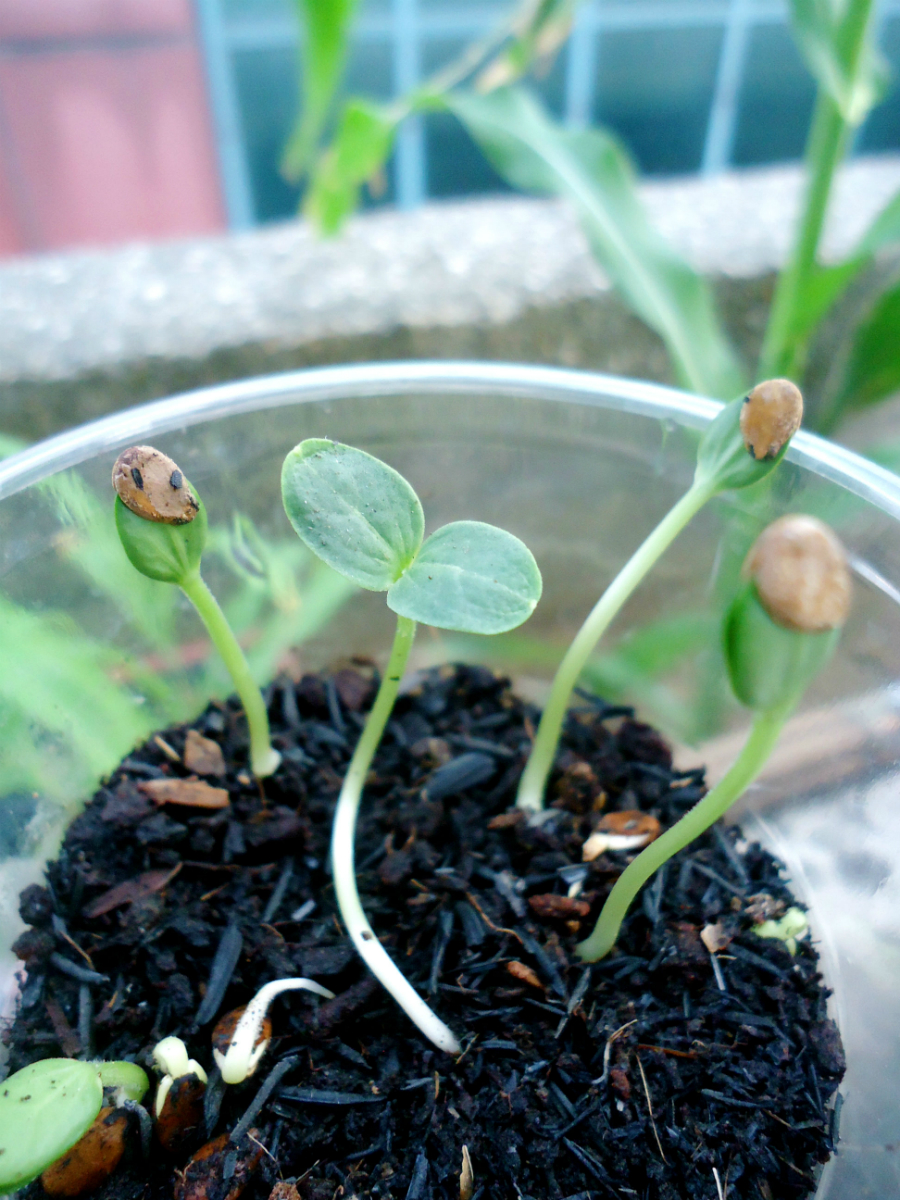
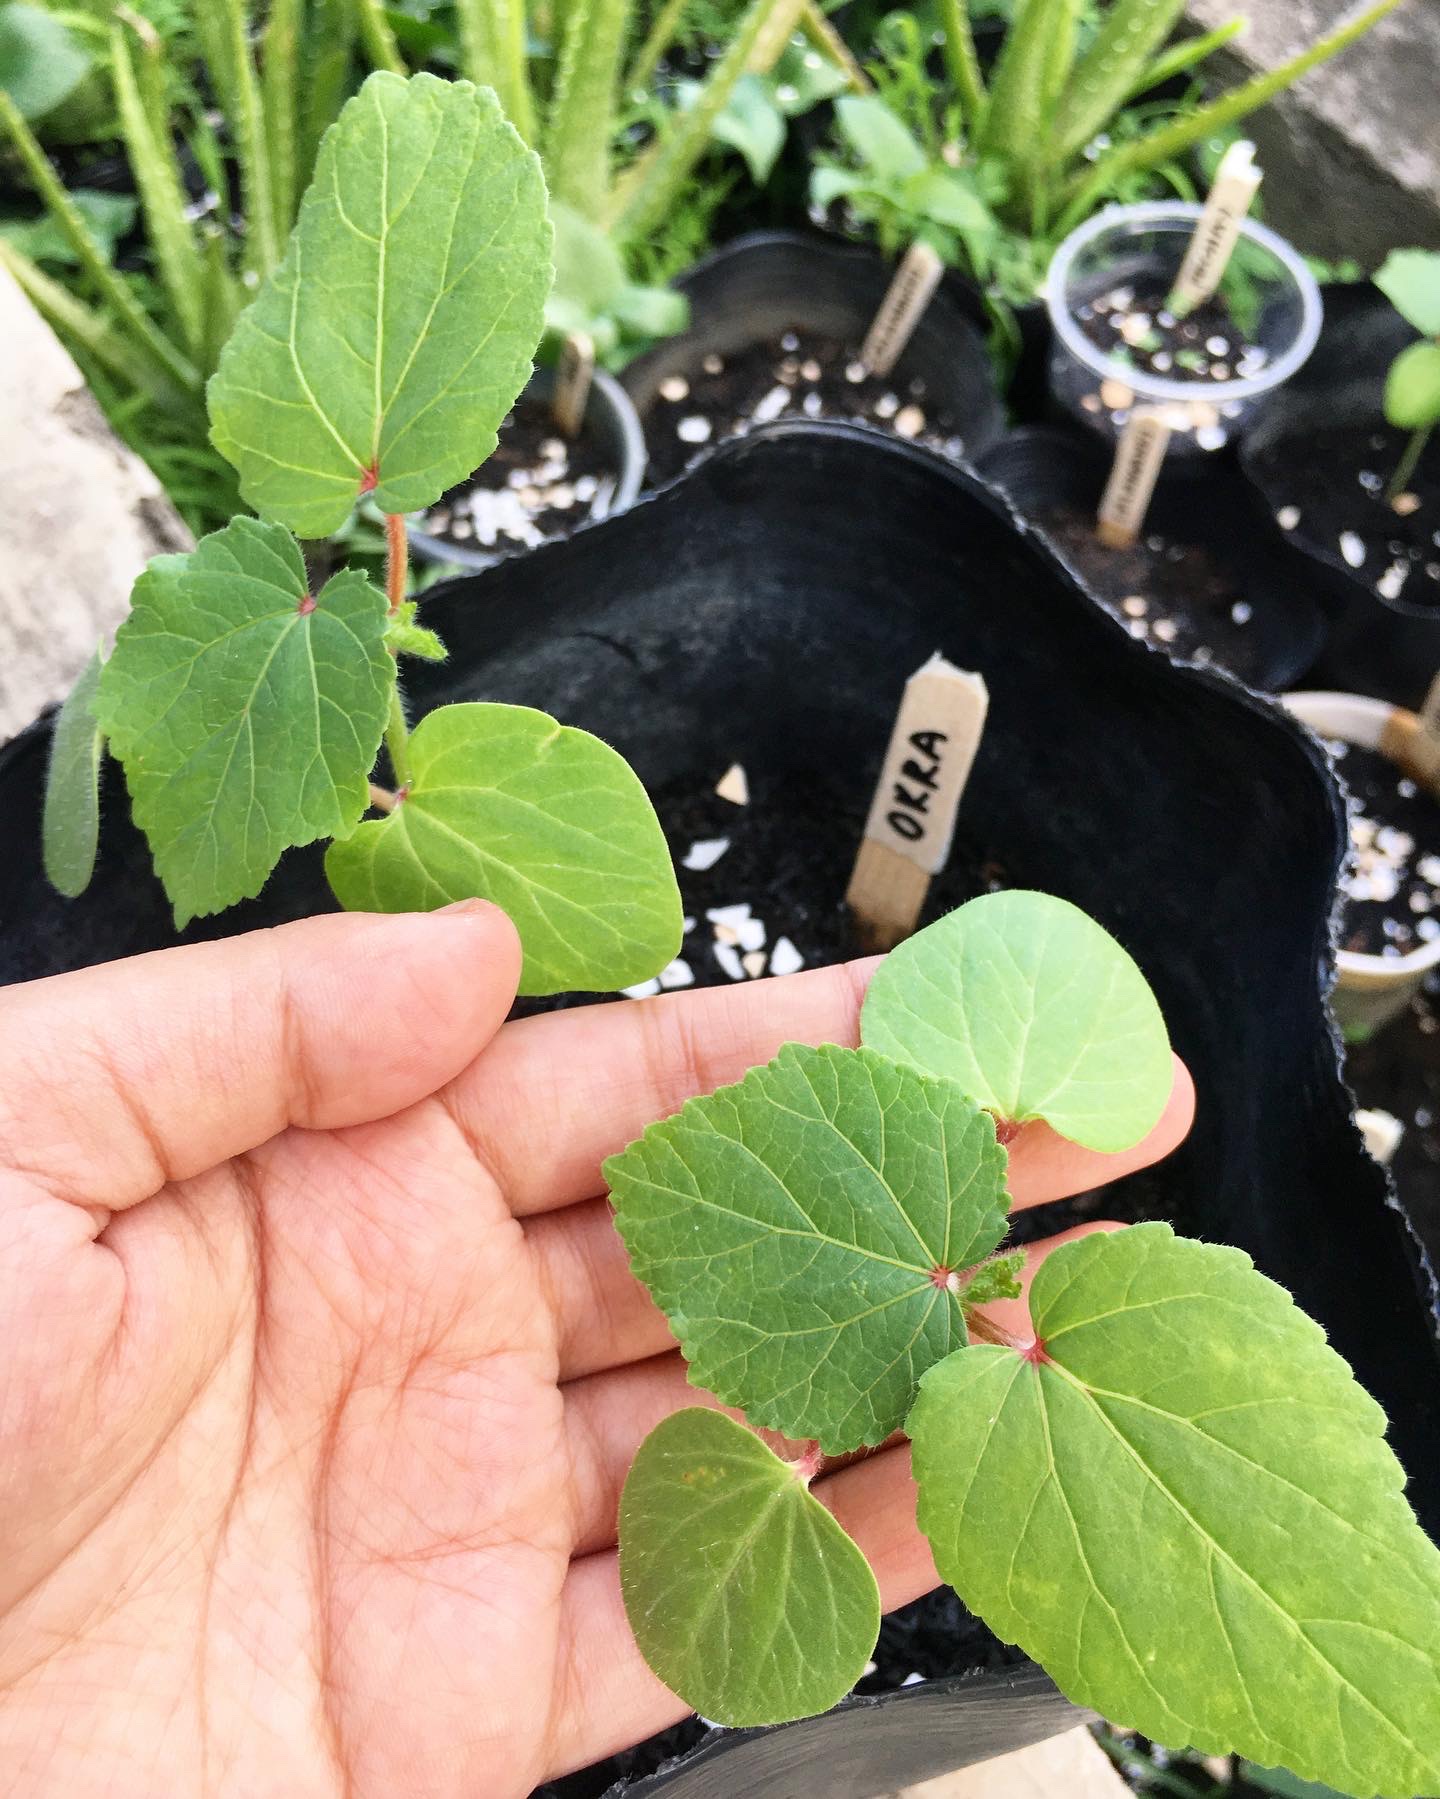
1. Plant one seed in a small plastic cup or container. It’s better to choose a soft type of plastic container so you can easily remove the seedling after a few weeks. Make sure that the container also has small holes for better drainage.


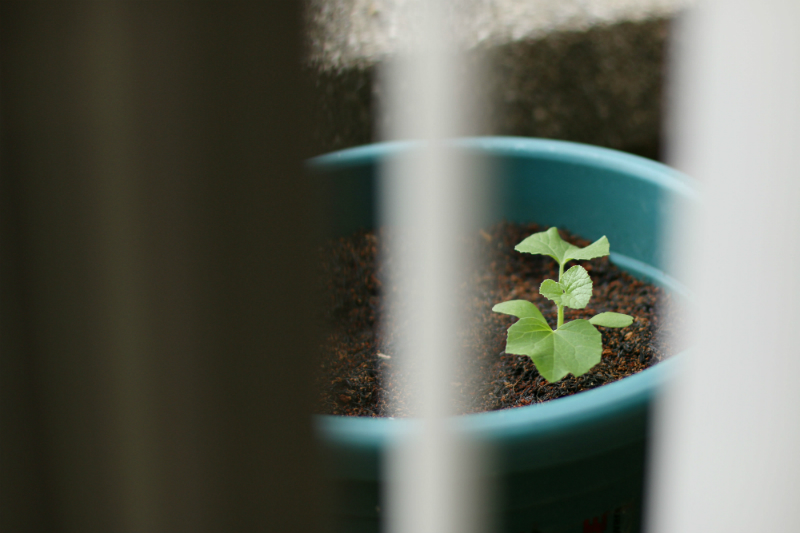
2. Because our weather in the Philippines is hot, I usually water my plants twice a day. You’ll know that you’ve watered enough when water starts to leak from the bottom holes of the plastic container.

3. Once the plant is 4-5 inches tall, you can now carefully transfer it to the bigger container where it will grow for months under the heat of the sun. Try not to hurt or pull the roots while you’re transferring the seedling. This might hinder your plant’s growth.

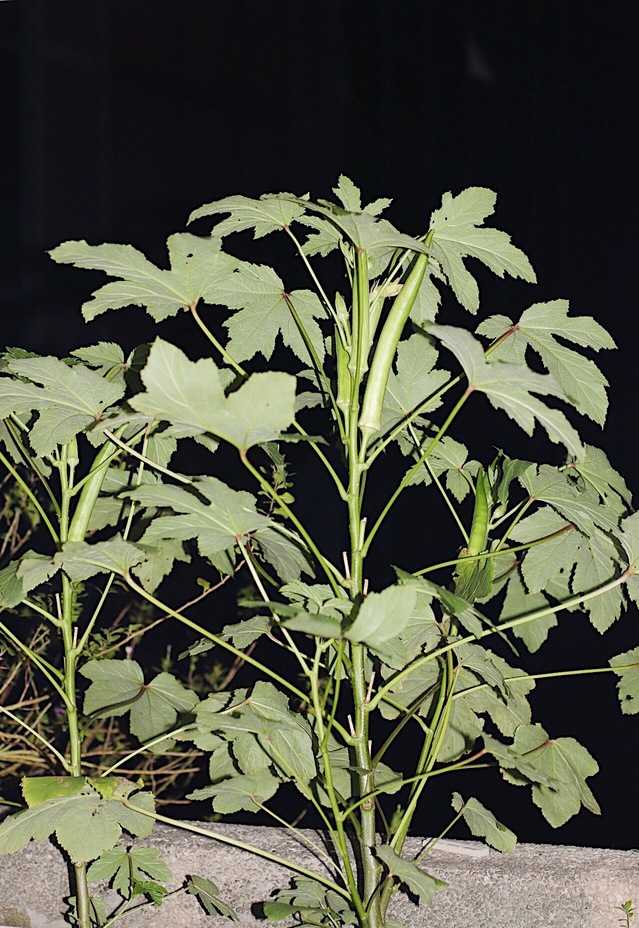
4. Continue watering the plant twice a day and applying organic fertilizer every two weeks. Soon, you’ll see the plant grow as tall as two meters in 2 months.


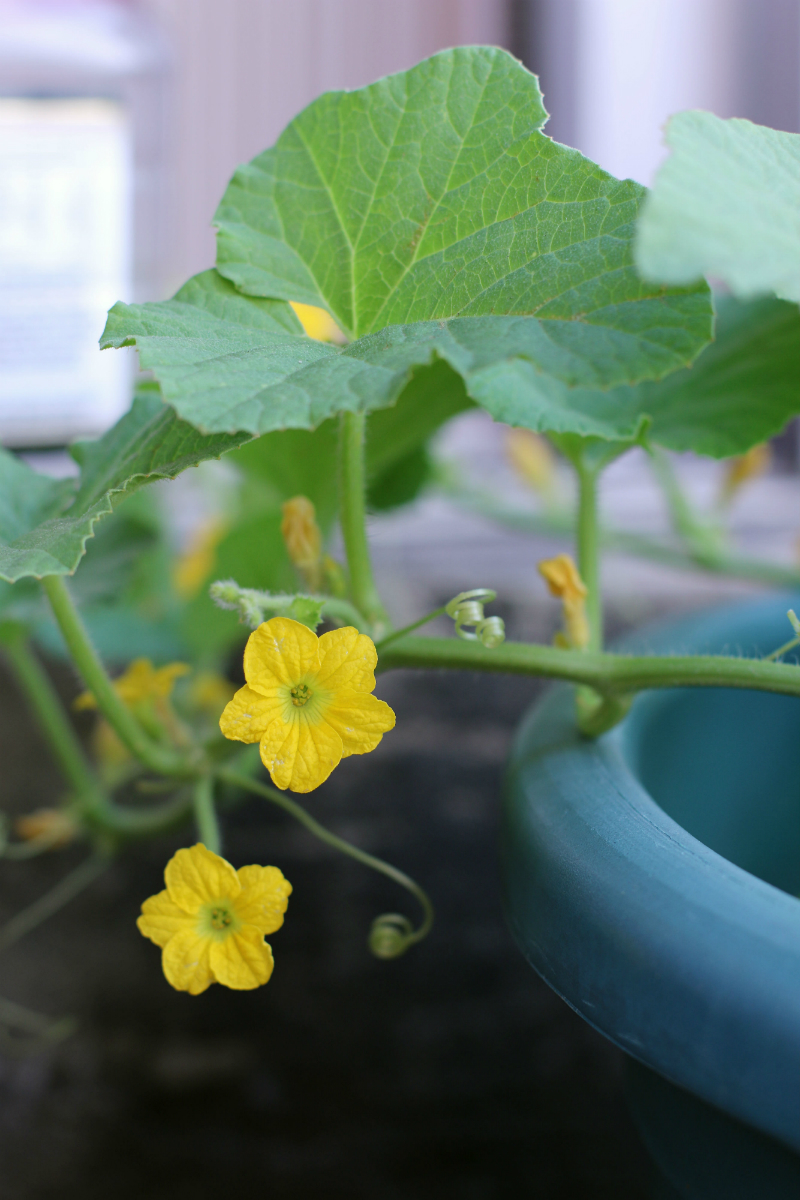
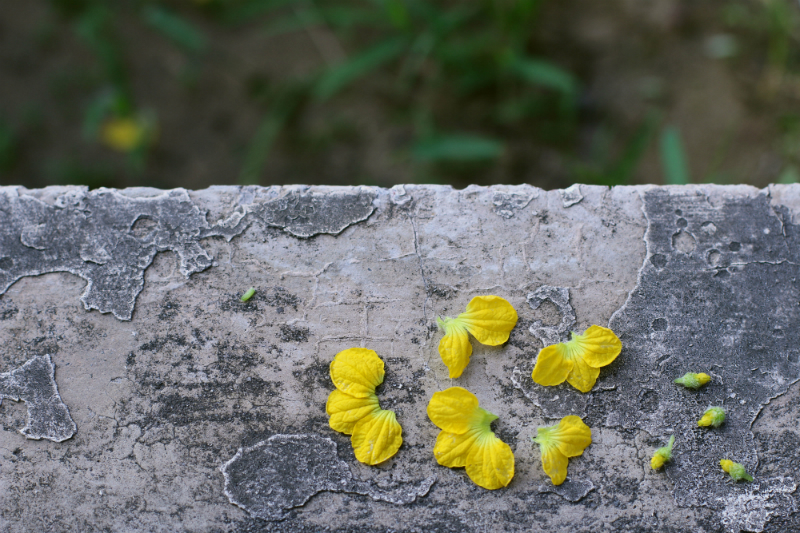
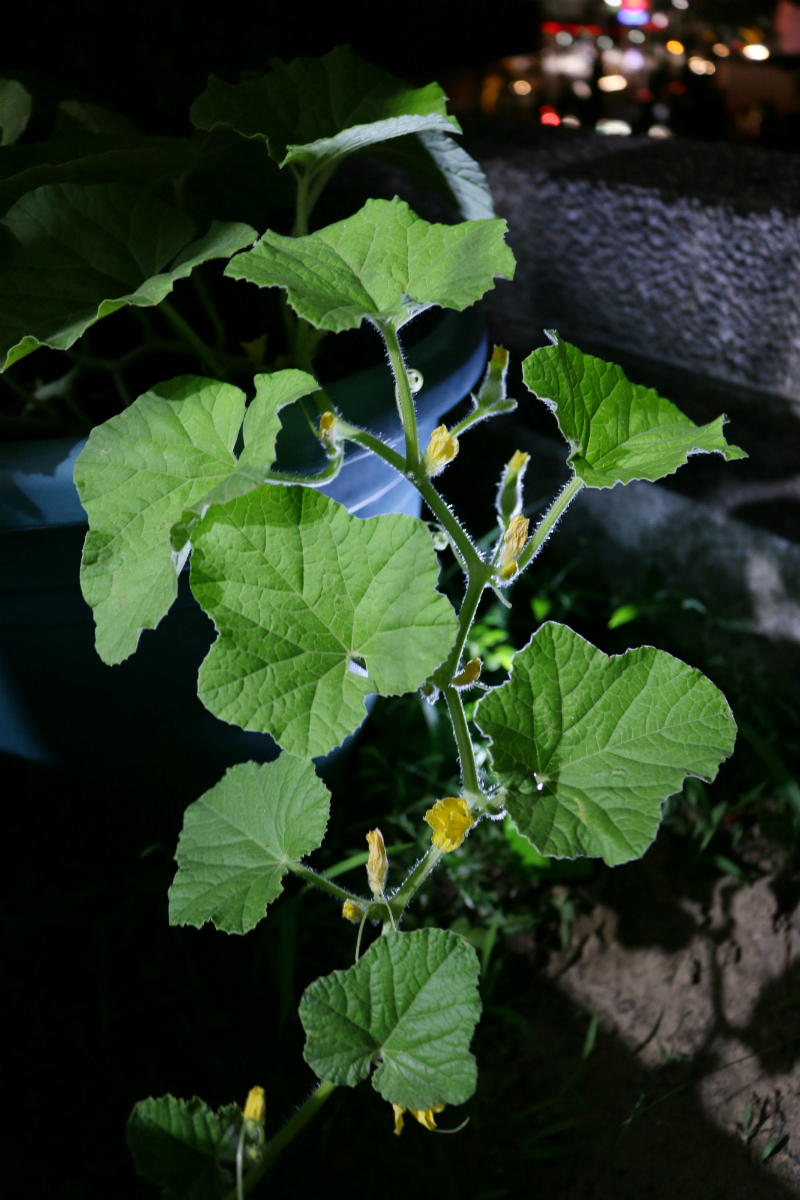
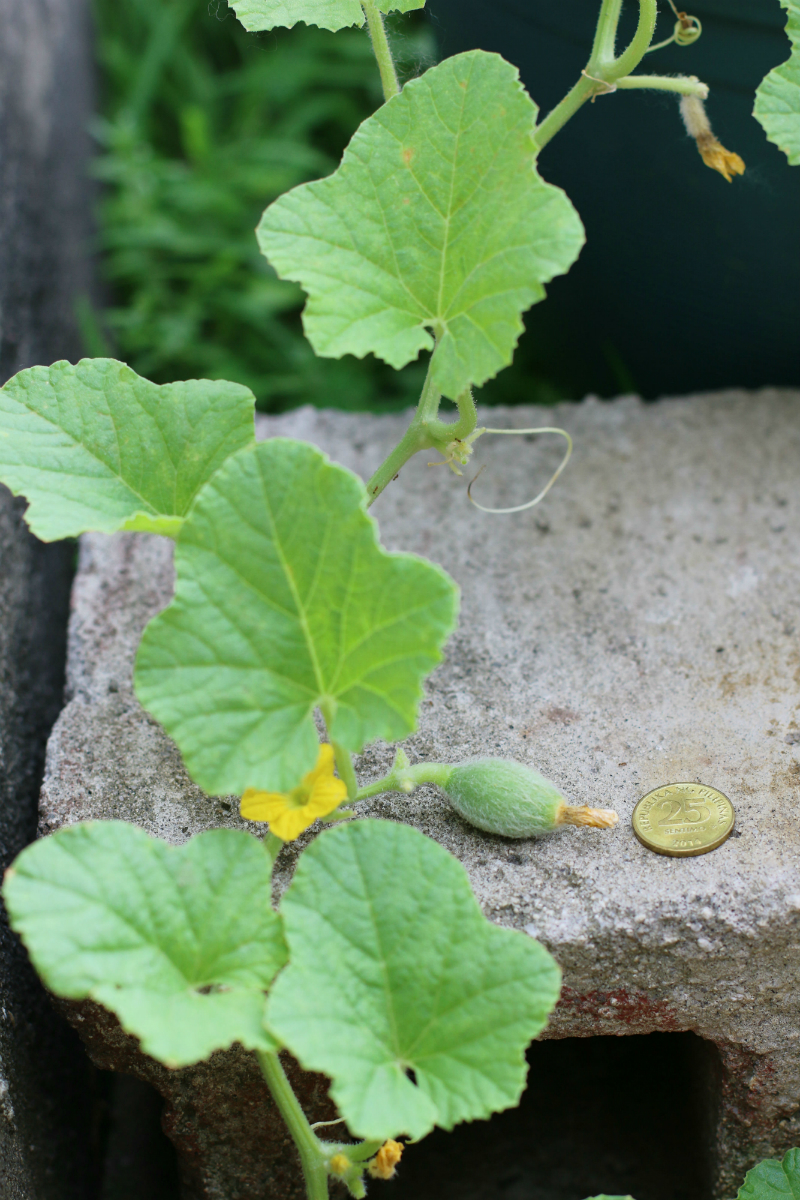
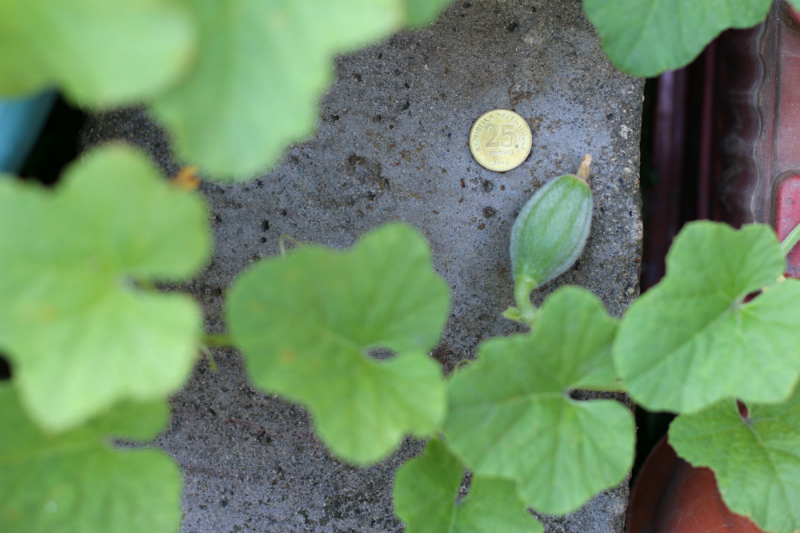
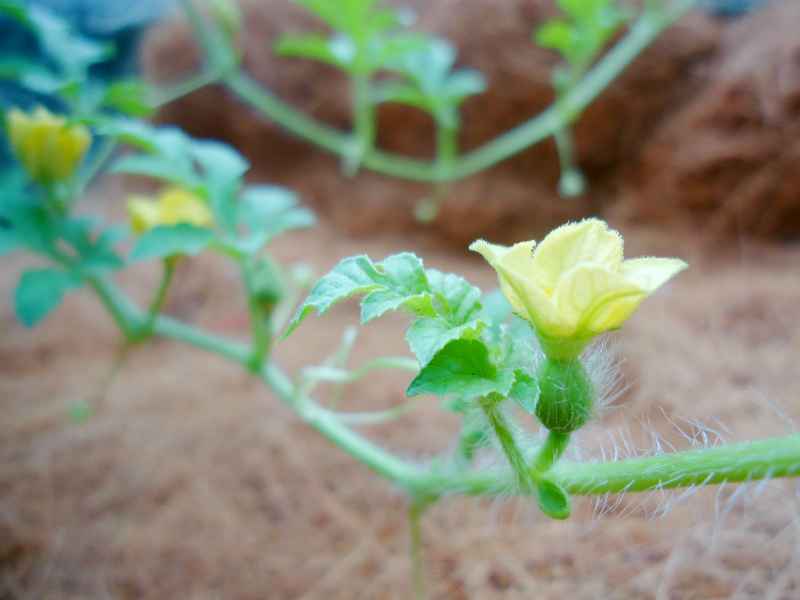
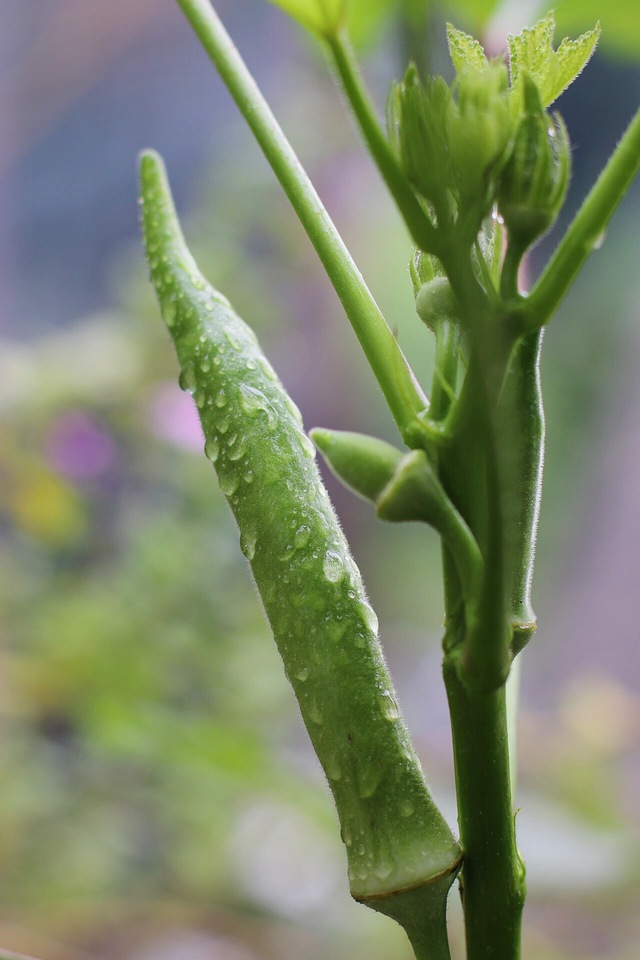
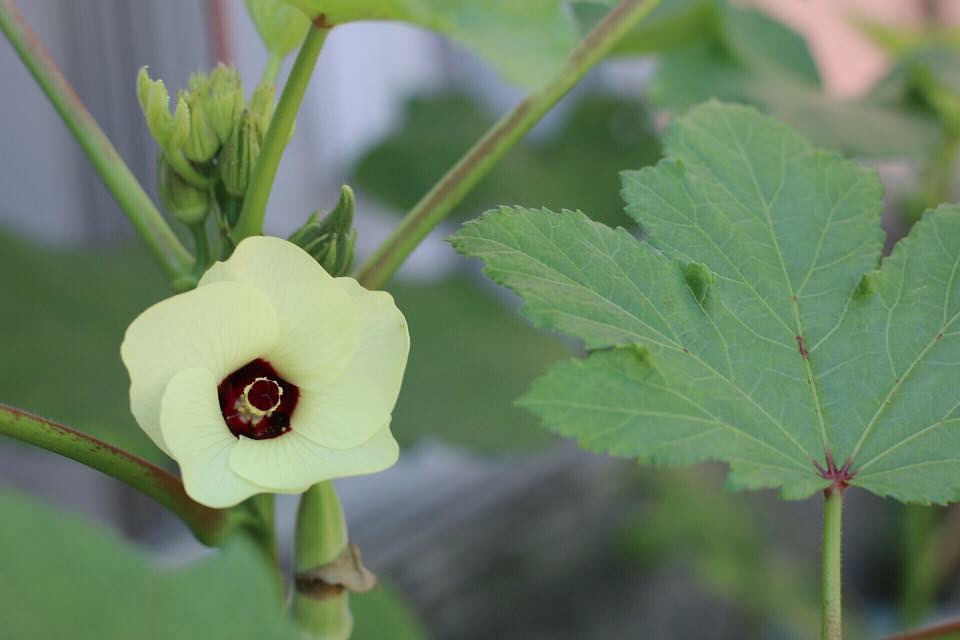
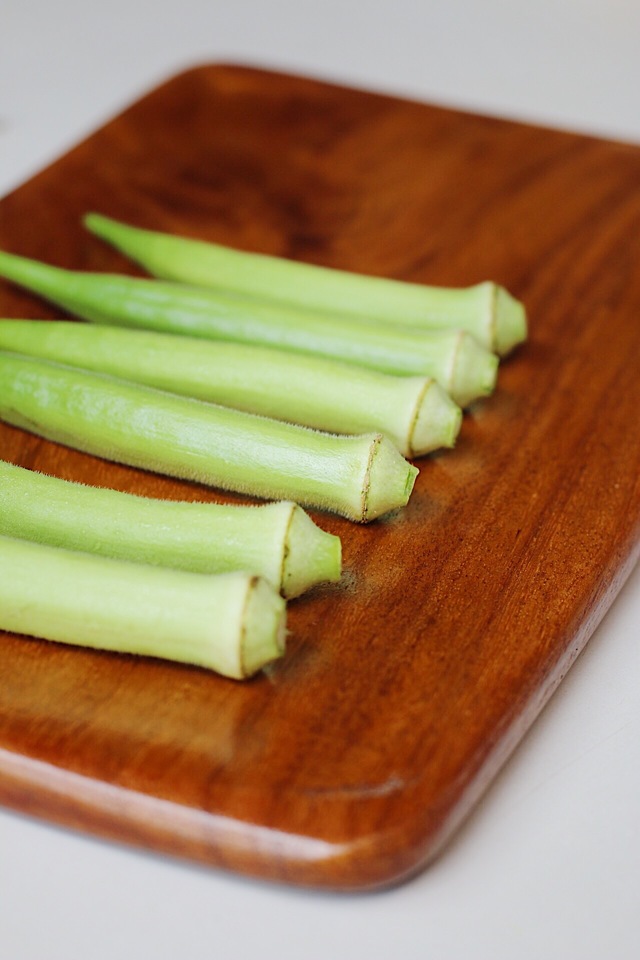
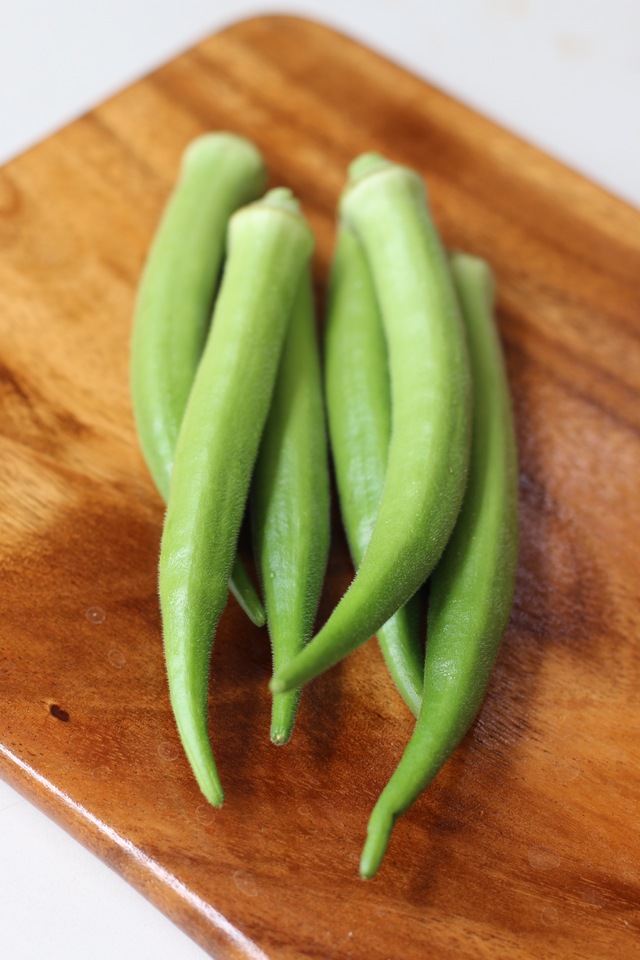
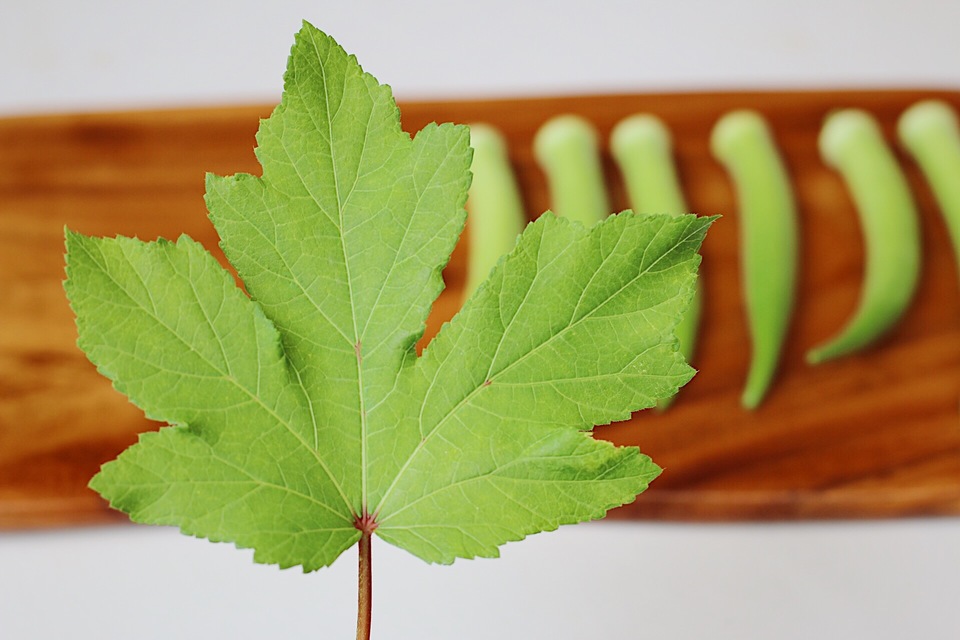
5. As you watch and water your plant, you’ll notice beautiful yellow flowers growing on the plant. These flowers will turn into the okra pods after a few days. It’s important to note that okra pods get tougher as they grow longer. So, once you see okra pods that are 3-4 inches long, make sure to snip them off of the plant. This is the best size for tender okra pods.


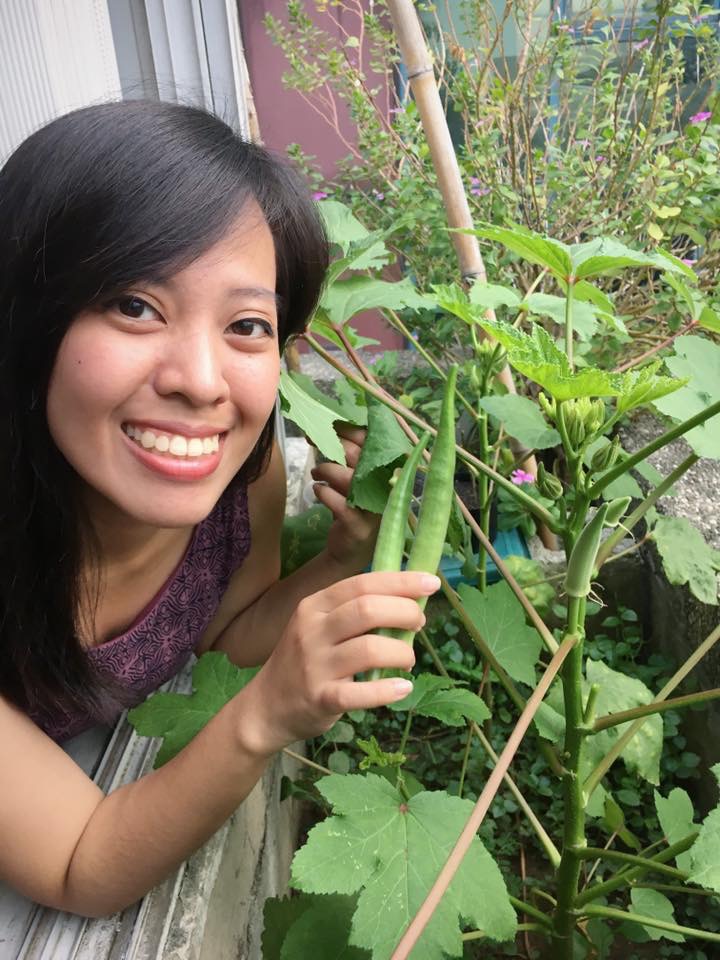
6. Another observation: The plant grows taller and expands more branches every time you snip off okra pods. After more than two months, I needed to stand on a chair just to harvest the pods at the top of the plant.

7. Another tip: the okra pods can get a bit prickly. It will be better if you use gloves whenever you harvest the pods. But, don’t worry, once they’re cooked, they won’t hurt your throat.

So, there you have it! A quick guide to growing okra plants in containers. Let me know if ever you plant some okra seeds! I’d love to hear from your experience and tips too!

Happy gardening!


For more gardening updates and tips, feel free to visit the ff. pages of ANYONE CAN GARDEN. :)

Facebook

Instagram

Make Room for Growth

This morning, I harvested my second batch of pechay leaves, which are also known as Bok choy or Chinese cabbage in other countries. The leaves I got from this batch were much bigger than the first ones I had last August. The ironic thing about it? I didn’t even know that I had one pechay seed growing in the pot until I saw a seedling in it three months ago. Today, by God’s grace, I snipped off a lovely bundle of big pechay leaves here at home.

img_5637

I happily showed my family members the stalks of pechay in my hand while they were having brunch earlier today. I then shared the background of the story and emphasized how interesting the experience was. Even though I exerted so much effort in the first batch by regularly watering, adding organic fertilizer, and taking care of the plants, they weren’t able to reach their maximum size. Why? Because there wasn’t any room for growth.

img_5672

One major mistake that I made while I was growing the first batch was planting too many seeds in a small area. Because the seedlings were overcrowded, their roots could not expand and fully develop under the soil. This resulted to smaller leaves and thinner stalks.

13507190_10154189037463548_4200543433497164490_n

For the second batch of pechay leaves, however, since it was only one seedling growing in the pot, it had adequate space for its roots to expand.  Even though I wasn’t able to add fertilizer to it as often as I did to the first batch, it still grew and reached its maximum potential. There weren’t other pechay plants absorbing the nutrients in the soil.

I learned two things today as I took photos of the larger pechay leaves at home.


FIRST: Hindrances to growth may also be the good things in life.

It is very easy to put the blame on the weeds and difficult moments in life whenever we experience delays in our growth. However, I am learning that even the good and seemingly harmless things may also hinder us from experiencing the best and becoming the best version that we can be. Of course, this still depends on how we respond. In gardening, I realized that fruit-bearing or leafy greens shouldn’t be overcrowded in a pot if we want them to grow and reach their full potential.

img_5670

In the same way, personally, I am reminded to be more wise and intentional in the way I manage my time, resources, and activities. For example, I’ve noticed how casually surfing the internet or social media applications take up a lot of hours in a day. Even though these aren’t bad tools, if I am not careful with how I use them, I may end up “overcrowding my soil” and not leaving enough space for more important things that can help me grow.

img_5660

Another example is being idle or enjoying too much rest or sleep. Yes, I do believe that rest is important. But, I also know that if I just sleep all day and not plan ahead on the activities that I can productively do in a day, then it would be a waste of time and resources.

What are the activities (both good and bad) that hinder me from reaching my full potential? In what areas do I need to improve on? (e.g. Physical fitness, communication skills, homemaking skills, preparation for exams or work, etc.)

img_5652


SECOND: God makes things grow.

This is my favorite part in this blog entry – the part where we talk about God’s grace. There’s something about the grace of God that strikes our hearts, humbles us, and inspires us to press on. In my case of growing pechay leaves, clearly, it was God who caused the growth of the second batch. Originally, I did not want to grow pechay during the months of September to December because I knew that we would be having rainy days in this tropical country. But, God allowed one pechay seed to be left behind and He helped it grow even without me attending to it daily. AMAZING.

img_5650

This experience encouraged me to depend on the Lord and not on my own strength and wisdom. He makes things grow. He can allow us to experience growth and reach our full potential in the different areas of our lives. We just have to trust in Him, do our part, and see Him work wonders in and through us. When I saw the lone pechay sprout in the pot, I had the choice to pluck it out. But somehow, even if it was just one seedling growing in the pot, I saw its potential and started to take care of it. I didn’t know that after three months, it would become a beautiful harvest, by God’s grace.

fullsizerender

Maybe there are areas in our lives right now that seem hopeless or seem to have no progress at all, just like the lone seedling in the pot. Maybe it’s a financial struggle or a heartbreak that we can’t seem to let go. Maybe it’s seeing little development from all of the hard work we’ve been doing or a blurry vision of our dreams and goals in life. Whatever it is, I hope that you will also be encouraged to surrender it to God, do your part, and trust that in His perfect timing, He will allow it and you to improve and grow.

“It’s not important who does the planting, or who does the watering. What’s important is that God makes the seed grow.” – 1 Corinthians 3:7

fullsizerender-1

How to Grow Melons in Containers

As mentioned in my previous post about melons , here are some things that we can take note of when we’re growing melons in containers. :)

1. Grow Seedlings

Start by planting seeds in small plastic cups filled with soil. It’s best to plant one seed in each cup for easier transplanting. Then, sprinkle fertilizer on the soil to help the seedling grow. After two weeks, it will most likely grow 4-5 inches long. By this time, you’ll see heart-shaped leaves (well, sort of) which have a furry texture.

how to grow melons (3) - Copy


2. Transfer to a Bigger Pot

When the seedling is about 4 inches long, you may transplant it so its roots can grow deeper in a bigger bed or pot of soil. You may use a large pot that is 15” wide and 15” tall. Any pot or container with a similar or larger dimension is enough. Before carefully transferring the seedling, make sure to sprinkle fertilizer on the soil and mix thoroughly. I usually add 2-3 tablespoons of powdered organic fertilizer to loose soil.

how to grow melons (1) - Copy

One important factor to consider when transferring the seedling is being gentle with the roots. Transplanting can be very stressful for any plant, so try to do your best not to damage or cut the roots in the process. Also, once the seedling is placed in its new container, its roots must be covered with soil and mulch (e.g. dried leaves, hay, etc.). This will protect the roots from being exposed too much to the heat of the sun.

how to grow melons (4) - Copy


3. Watch Out for Flowers (Male and Female)

This is one unique trait of fruit-bearing vines. They grow male AND female flowers. The latter ones eventually become the fruit, when they are properly pollinated with the male flowers. It’s important to look out for the flowers when the plant is growing because the female flower only opens up for a few hours in its lifetime.

how to grow melons (7) - Copy

If you don’t get to transfer pollens from the male flower to the female flower, the fruit won’t grow. The male flowers will first appear and then, after a few days, female flowers will bloom too. The difference between the two is the flower’s stalk. The male flowers have a thin stalk; while the female flowers will have a rounded one, similar to having a small ball below the yellow petals.

how to grow melons (6) - Copy


4. Pollinate by Hand

When the fruit-bearing vines are grown in larger areas like farms and fields, pollination is usually done by the bees. But, if we want to grow fruits from vines in smaller containers at home, it would require pollination by hand. How exactly do we pollinate by hand? It’s a simple process, but it can only be done when the female flower opens up. Once you see the petals of the female flower spread out, you can get one to three male flowers and remove its petals.

how to grow melons (8) - Copy

Our goal is to transfer the yellow dots (pollens) from the middle of the male flowers to the bud of the female flowers by carefully rubbing it against the latter. After a few hours, you’ll notice that the petals of the female flowers will start to close up and cover the bud. Then, in a few days, it will begin to form the fruit.

how to grow melons (5) - Copy


5. Fertilize and Water when needed

You can add fertilizer to the plant every time it goes through the different stages of growth (e.g. when the plant grows it leaves, longer stems, flowers, and fruits). Another option is to add fertilizer every two weeks. On the other hand, when it comes to watering the plant, you can water the plant once a day, depending on the weather in your area. Since it’s hot and humid in the Philippines (where I live), I usually water the plant once or twice a day. However, by the time the fruit matures, it’s best to lessen the water added to the plant’s soil. Overwatering may hinder the fruit from reaching its maximum sweetness.

how to grow melons (9) - Copy

how to grow melons (10) - Copy

how to grow melons (11) - Copy

how to grow melons (12) - Copy


6. Harvest

Melons that are ready for harvest will show the ff. signs:

a. The color of the melon will turn from green to orange or yellow orange.

b. The fruit will have a sweet smell especially when you go closer to the stem of the fruit.

c. The stem will easily detach from the fruit when you slightly move the melon.

how to grow melons (14) - Copy

how to grow melons (13) - Copy

how to grow melons (18) - Copy

how to grow melons (16) - Copy

If you are into gardening, growing fruits from vines is a fun and challenging experience that I would recommend. There’s nothing like slicing a sweet, homegrown melon in half and seeing the seeds and juices flow on the chopping board. It was such a refreshing and delightful moment! If you would like to give it a try, I would encourage you to plant the seeds in January or February, so you can harvest it by March or April. Fruit-bearing vines don’t grow well during the rainy season. Hopefully, I can try to grow more early next year.


For more gardening updates and tips, feel free to visit the ff. pages of ANYONE CAN GARDEN. :)

Facebook

Instagram

how to grow melons (15) - Copy

how to grow melons (17) - Copy

how to grow melons (2) - Copy

how to grow melons (19) - Copy

how to grow melons (20) - Copy

Thank God I Failed

Have you ever experienced exerting so much effort on a certain project or goal only to watch it fail in the end? Well, I have. For those of you who know me, you understand that gardening is very close to my heart. One of the most disheartening experiences I’ve had was when I saw my watermelon vine slowly deteriorate during the rainy season. Despite my attempts to keep the beautiful leaves and watermelon flower buds dry and safe from the constant heavy rain, it just didn’t survive.

DSC02160 - Copy

Slowly, I saw the flowers turn from green to light green to yellow to brown. I took a deep sigh after I realized that it could no longer be revived. The dream of growing a watermelon at home was washed away by the rain as well. What a bummer. I think it took a couple of days for me to finally let go of what happened.

DSC02214 - Copy

Even before I planted the seed, I knew that we were approaching the rainy season already and it wasn’t advisable for fruiting vines. If I only waited for a few more months, it would have been possible to grow the fruit in a container. But, I failed. I failed to grow a watermelon at home. Nonetheless, I still thank God that I did because it helped me to be wiser in the way I use the resources that I had. It also encouraged me to still put my confidence in Him and in His perfect timing even in my gardening adventures.

IMG_7128 - Copy

Seven months after that incident, by faith, I decided to plant a melon seed. This time, I planted it at the start of the year, so I was sure that it wouldn’t encounter daily heavy rains anymore. After taking care of the vine for two and a half months, by God’s grace, I was able to harvest my first homegrown melon at home. While I was eating a slice of the sweet melon, I couldn’t help but feel overjoyed because it finally happened! I also remember telling my siblings how mind-blowing and heartwarming it was to eat fresh fruits and vegetables grown at home.

IMG_8601 - Copy

Through this experience, I was reminded of my former blog post about growing watermelon at home and how God’s timing is always perfect. Yes, it may have been rough for me at first, especially when I saw that my efforts were “put to waste”. However, I’m learning that disappointments, failures, and discouragements will always be around. But, these things shouldn’t give us an excuse to stop trying and doing our best again. What I appreciate about disappointments and failures too is that we get to have opportunities that help us grow more in wisdom, knowledge, and character.

Mary Pickford once said “If you have made mistakes, even serious ones, there is always another chance for you. What we call failure is not the falling down but the staying down.”

Maybe some of you are also going through a rough situation. Maybe some of you have experienced failure recently. I want to encourage you today to get back up again and keep on doing your best. By God’s grace, you can! I pray that in spite of the pain or struggle you may be feeling, you will still find hope in the goodness of the Lord.

“Trust in the Lord with all your heart
and lean not on your own understanding;
 in all your ways submit to him,
and he will make your paths straight.

-Proverbs 3:5-6

Note: I’ll share more about the process and experience of growing melons at home in another blog post. :)

Subscribe to Blog via Email

Enter your email address to subscribe to this blog and receive notifications of new posts by email.

About Me

My name is Nicole Obligacion and I started this blog because I was inspired by Hebrews 10:24 and Hebrews 3:13. I love to eat, cook, bake, read the Bible, and encourage. :)

copyright © 2012 - 2024 encouragingtreats.com this site is designed, managed and optimized by sean si of seo hacker